

A walk-in pantry works best when it is planned around daily movement, not simply filled with shelves. The right layout helps you see what you have, reach it comfortably, and return groceries or small appliances to a clear, consistent home.
The most useful walk-in pantry design ideas connect storage to the way your household cooks, shops, and moves through the room. Plan circulation first, then shape work zones, shelf placement, appliance storage, lighting, and finishes around those routines.
That approach also leaves room for the details that make a pantry feel calm rather than crowded. Before choosing materials or accessories, consider how the walls, doorway, corners, and nearby kitchen traffic work together. A thoughtful layout gives every later decision a practical purpose.
What Makes Walk-In Pantry Design Ideas Work?
A well-planned walk-in pantry should make common routines feel natural. The best layout supports the path from kitchen to pantry, gives frequently used items an easy-to-reach home, and keeps storage from becoming an obstacle. Before choosing shelves or accessories, consider how your household moves, cooks, stores ingredients, and retrieves supplies throughout the day.
Plan your pantry design consultation
Begin by mapping circulation. Identify the entry door, the direction it swings, and the areas that need to remain clear when someone is entering or leaving. A pantry may offer generous wall space, but a poorly placed cabinet or deep shelf can make the room feel tight. Think about the route between the refrigerator, prep area, cooking surface, and pantry. Storage should support that route rather than force unnecessary backtracking.
Door swing matters for another reason: it affects sightlines. When the door is open, you should still be able to see the storage zones that hold everyday items. If the entry blocks a corner or hides an entire wall, reserve those less visible areas for backstock or occasional-use equipment. Keep daily staples where they can be seen quickly from the doorway or from the main working position in the kitchen.
Plan Around Reach Zones
Reach zones are a practical way to decide what belongs where. Place the items used most often in the easiest positions to see and retrieve. Less frequently used serving pieces, seasonal supplies, or reserve quantities can occupy higher or lower storage, provided they remain accessible. This approach is design guidance, not a universal height rule. Each household has different routines, preferences, and physical considerations.
Consider the sequence of a typical task. Baking supplies may work best together near the area where ingredients are gathered. Lunch and breakfast staples should be easy to locate without searching behind larger containers. Appliances need enough surrounding clearance for the way they are actually used, while bulk items need a location that does not interrupt the main path. The goal is not to fill every wall. It is to place each category where the next action is obvious.
Use the Room’s Shape Intentionally
Walk-in storage systems can be customized across multiple walls, so the room’s shape and fixed features should guide the plan. Windows, corners, outlets, trim, and the door opening can all influence where storage fits comfortably. A documented walk-in closet example used custom-height storage under a window, illustrating how architectural constraints can become part of the layout rather than a problem to work around.
Finally, separate circulation from storage decisions. First establish a clear route and useful sightlines. Then assign zones for daily items, backstock, appliances, and occasional-use pieces. This planning sequence keeps the pantry functional before adding drawers, adjustable shelves, or other components. It also helps a designer develop a layout that reflects the way your household actually uses the room, instead of forcing your routines into a generic arrangement.
How Should You Divide a Pantry Into Work Zones?
The most useful pantry layouts follow the rhythm of your kitchen rather than treating every shelf as interchangeable. Group items according to how often you reach for them, where they support meal preparation, and how they move back into storage after use. This approach makes a walk-in pantry feel intuitive because each zone has a clear job.
Everyday reach-in storage
Place frequently used ingredients and serving pieces where they are easy to see and retrieve. Everyday staples, breakfast foods, snacks, and commonly used cooking supplies should not be buried behind seasonal or bulk items. Adjustable shelves can help accommodate containers that change over time, while divided drawers can keep smaller items from spreading across a shelf. The goal is not to fill every available surface. It is to create a clear visual field where the items you use most are immediately recognizable.
Think about the way you enter the pantry and the direction you naturally turn. The first section within comfortable reach can become the everyday zone. If more than one wall is available. Storage can be customized across multiple walls so the layout supports the room instead of forcing every category into one narrow run. This kind of planning is central to custom pantry storage.
Backstock and seasonal storage
Reserve a less prominent area for duplicates, bulk purchases, entertaining supplies, and items used only part of the year. Backstock works best when it remains visible enough to review before shopping, but does not compete with the daily-use zone. Use consistent categories, such as canned goods, baking reserves, paper products, or holiday serving pieces, and keep each category together. A pull-out or accessible lower storage area can make heavier items easier to manage without placing them in the busiest part of the pantry.
Prep support and small appliances
A pantry can also extend the working area of the kitchen. Create a prep-support zone for mixing bowls, baking ingredients, cutting accessories, or other tools that are used together. If you regularly use a stand mixer, blender, coffee equipment, or another small appliance. Give it a deliberate home rather than allowing it to occupy whichever shelf is open. Store the appliance near the ingredients and accessories that support its use, and consider whether it needs a convenient lift-out or open landing area. The best placement depends on your routine, the pantry entry, and the available power access, so treat these as planning questions rather than universal rules.
Trays, serving pieces, and cleanup-adjacent items
Flat trays, platters, and cutting boards deserve a zone that prevents them from leaning precariously among cans and jars. Vertical dividers or a dedicated section can keep these pieces organized and easier to remove. Keep serving pieces near entertaining backstock if that is how you use them. Or closer to the kitchen transition if they regularly move between the pantry and dining area.
Finally, consider cleanup-adjacent storage. Paper towels, food storage containers, reusable bags. And backup cleaning supplies may be more useful near the pantry entrance or along a lower section than mixed into food storage. When each zone reflects a real household task, the pantry becomes easier to reset after cooking and easier for everyone to use consistently.
Which Shelf Depth and Storage Heights Keep Items Visible?
Visibility depends on more than the number of shelves in a walk-in pantry. A useful plan matches shelf depth and storage height to the items you reach for, the containers you use, and the way the room’s architecture shapes access. The goal is to see what is stored without pulling out several items first or allowing a deep shelf to become a second row of forgotten supplies.
Start by grouping items according to how they are used. Everyday ingredients and open food containers deserve a position that is easy to see and reach. Reserve higher or less convenient areas for seasonal serving pieces, backup supplies, and items used only occasionally. Adjustable shelving can support that change over time, especially when container sizes and household routines evolve. Custom storage systems may combine adjustable shelves with drawers, hampers, shoe storage, and other components. So a pantry plan does not have to rely on one shelf format everywhere.
| Storage need. | Planning approach. | Visibility check. |
|---|---|---|
| Daily ingredients. | Keep near the easiest reach zone | Labels and fronts stay visible |
| Tall bottles. | Allow height without blocking nearby items | Check necks and caps from the aisle |
| Small containers. | Use shallow or divided storage | Prevent a hidden second row |
| Occasional items. | Place higher or farther from the main path | Keep a clear retrieval route |
Depth should follow the contents, not a generic rule. A shelf that is deeper than the items it holds can create unused space behind the front row. A shelf that is too shallow may leave tall containers unstable or force them into another storage zone. Consider the largest containers, the clearance needed to lift them out, and whether you can see the back edge while standing in the aisle. Drawers or divided sections can be a better choice for small packets, wraps, and other items that tend to disappear on a broad shelf.
Storage height also needs to respect both reach and the room itself. Windows, doors, corners, outlets, and ceiling changes may determine where a shelf can continue and where a lower or shorter section makes more sense. One documented 12-by-6 walk-in closet example used 24-inch-deep material and custom-height storage beneath a window. That example shows how architecture can shape a practical plan; it does not establish a standard pantry depth. Pantry dimensions should be selected around the specific room, contents, and circulation needs.
For a deeper look at how shelf planning differs from the broader layout decisions in this article, review the pantry shelving design guide. The strongest walk-in pantry design ideas treat shelves as part of a complete storage system: each level should support a clear task. Keep commonly used items visible, and leave enough room to move comfortably through the space.
How Can Lighting and Appliance Storage Improve Daily Use?
A walk-in pantry can be beautifully organized and still feel inconvenient if the corners are dim or the appliances are difficult to reach. Lighting and appliance storage should support the way you actually move through the room. Think about when you prepare coffee, unload groceries, assemble meals, or look for a less frequently used serving piece. The right plan makes those routines visible and predictable instead of turning every search into a small interruption.
Layered lighting is often more useful than relying on one central fixture. General illumination helps you move safely through the pantry, while focused light can make a countertop, prep area, or frequently used shelf easier to use. Lighting at the work surface can reduce shadows cast by upper shelving. In a corner, a brighter, well-placed source can help reveal items that would otherwise disappear behind the front row. Your electrician or other licensed trade professional can advise on the appropriate installation approach for your home. The storage plan should coordinate with that conversation rather than assume a particular electrical requirement.
Plan visibility around real tasks
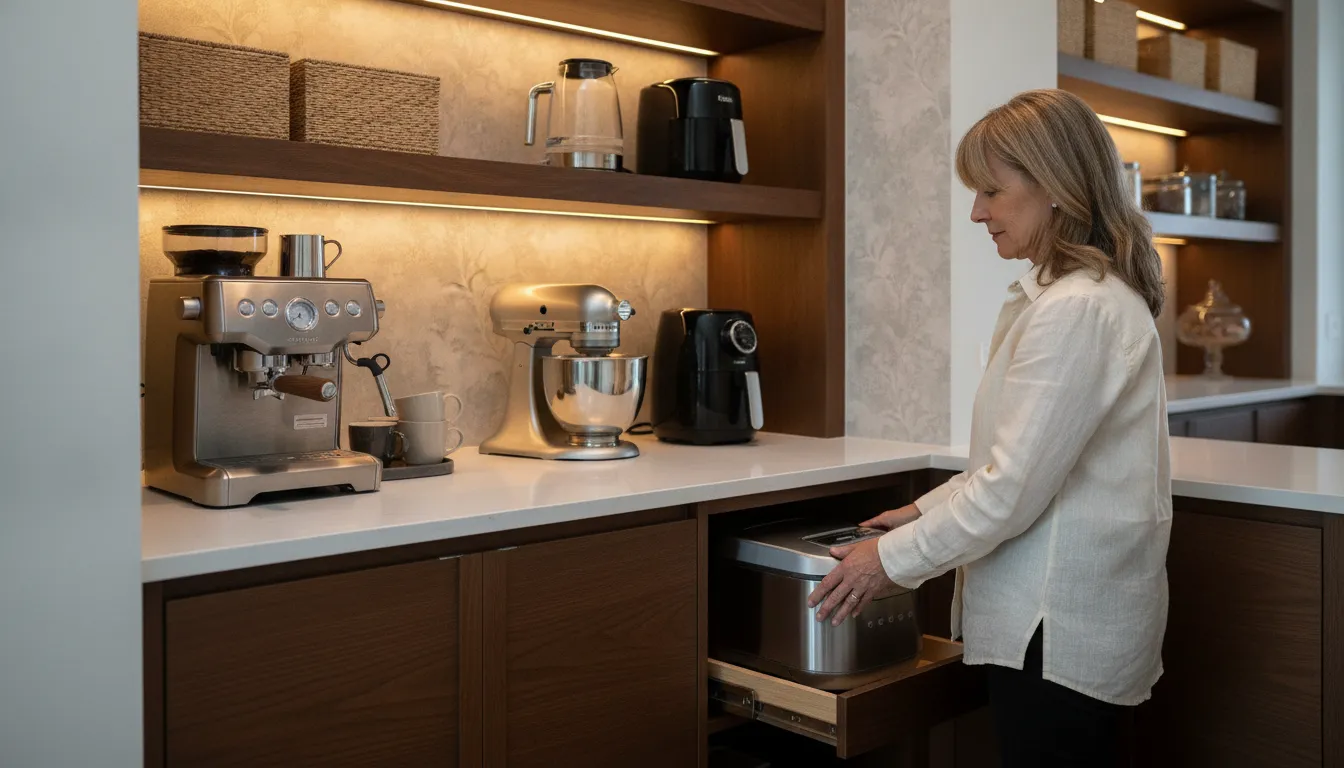
Start by identifying the areas where you pause and work. A pantry coffee station, baking shelf, or staging surface may deserve better task lighting than a wall reserved for backup supplies. Keep the most frequently used items where the light reaches them clearly, and avoid creating deep, shadowed pockets with unnecessary layers of storage. This is one reason a useful pantry plan considers how homeowners cook, store, and retrieve items, not just how many shelves can fit.
Give small appliances a practical home
Appliance storage works best when it reflects frequency and weight. Keep heavy or regularly used appliances at a comfortable, accessible level instead of placing them where lifting or repeated bending becomes part of every use. A dedicated shelf, appliance garage, or open work zone can keep a mixer, toaster, blender. Or similar item from taking over the main counter while still making it easy to retrieve. An appliance garage may be appropriate when you want a visually contained station, while an open shelf may suit an appliance used throughout the day. The choice should follow your routine, available outlets, ventilation needs, and the surrounding door and walkway clearances.
Adjustable storage components can also help as your routines change. Creative Closets documents options such as adjustable shelves, divided drawers, and other specialized organizers for custom storage systems. But pantry components should be selected around the items you own rather than copied from a generic display. Our pantry shelving design guide can offer a closer look at shelving considerations, while this broader approach keeps lighting, circulation, and appliance access working together.
Picture the finished room at dinner time: the frequently used appliance is within reach. The work surface is clearly lit, and the back corner is easy to scan without moving half the pantry. Those small decisions can make a walk-in pantry feel calmer and more useful every day.
What Finishes and Details Suit a Walk-In Pantry?
A walk-in pantry feels intentional when its finishes support the way the room is used and relate naturally to the adjoining kitchen. Choose a calm, cohesive palette for the main surfaces, then let the storage arrangement provide visual interest. A finish that is easy to wipe clean and does not make everyday spills feel conspicuous can help the pantry stay presentable through regular cooking and grocery routines. The goal is not to make the room look formal. It is to make each detail feel considered.
Visual continuity can come from repeating a kitchen color, hardware tone, or wood character without copying the kitchen exactly. If the pantry is visible from the cooking area, consistent details help it read as an extension of the home rather than a separate utility room. If it sits behind a closed door, you have more freedom to create a distinct mood while keeping the storage practical.
Choose between open shelving and doors
Open shelving makes frequently used ingredients, serving pieces, and small appliances easy to see. It works especially well when categories are kept orderly and the shelves are designed around the items they hold. Doors create a more concealed appearance and can reduce visual busyness when the pantry is near a busy kitchen. They can also be useful for storing less attractive equipment or supplies that do not need to stay on display.
Many homeowners benefit from using both approaches. Open shelves can handle daily-access items, while doors or drawer fronts conceal backup stock and specialized tools. The right balance depends on how often the pantry is accessed, how visible it is from nearby rooms. And whether the household prefers quick visual access or a calmer, more concealed look.
Use hardware and adjustable components with purpose
Hardware should feel comfortable in the hand and coordinate with the rest of the kitchen without competing for attention. Pulls, knobs, and drawer fronts can give the room a finished appearance, but the most successful details also improve access. Adjustable shelves allow the storage to adapt as containers and routines change. Divided drawers, pull-out organizers, baskets, and other specialty storage accessories can give particular categories a defined home without forcing every item into the same type of storage.
Keep the visual system consistent by repeating a small number of finishes and using labels only where they genuinely improve retrieval. When color, hardware, doors, and storage components all support the household’s workflow, the pantry feels like part of the home’s design rather than an afterthought.
When Should You Bring In a Pantry Designer?
A pantry designer becomes especially useful when the room has more potential than a few freestanding shelves can provide. If you are planning a renovation, working around a doorway or window, adding appliance storage. Or trying to make several walls function as one system, professional planning can help you make decisions before installation begins. The goal is not to fill every available inch. It is to create a pantry that supports the way your household moves, cooks, stores, and retrieves items.
For homeowners in King and Pierce Counties, a pantry design consultation can bring that planning process into the home, where the room’s actual architecture and daily routines are visible.
- Clarify the daily workflow. Start by noting what enters the pantry, where it is used, and who reaches for it most often. List bulk groceries, small appliances, serving pieces, baking supplies, beverages, and cleaning items that need a home. Pay attention to moments that currently feel awkward, such as moving around an open door. Searching behind tall containers, or carrying an appliance from a distant shelf to the kitchen counter. These observations help a designer assign storage according to real use rather than an idealized picture of the room.
- Document the room and its architecture. Before choosing components, record the room’s walls, entry, windows, outlets, lighting, and any changes in ceiling height. Architectural features may determine where tall storage belongs and where a lower work surface makes more sense. Creative Closets has documented custom storage examples shaped around features such as windows. Which illustrates why a plan should respond to the room instead of forcing a standard arrangement onto it. A walk-in system can also be distributed across multiple walls, so circulation deserves as much attention as capacity.
- Assign zones around the way you use the pantry. Group items by task and frequency. A baking zone might sit near mixing supplies, while beverage storage, small appliances, everyday staples, and less frequently used serving pieces can have separate homes. Components such as adjustable shelves, divided drawers, hampers, or specialty organizers may support different zones, but each should have a clear purpose. The right mix depends on your household, not a preset checklist.
- Review a three-dimensional plan. A 3D view makes it easier to evaluate sightlines, reach, door clearance, and the relationship between shelves and work areas before anything is built. Creative Closets offers custom 3D design during an in-home consultation for walk-in closet projects, and the same design-led approach can help clarify a pantry plan. Use the review to ask practical questions: Can you see everyday items? Will an open appliance door obstruct movement? Are the busiest zones convenient without making the room feel crowded?
- Coordinate the installation handoff. Once the layout reflects your routines and the room’s constraints, confirm which components belong in each zone and how the plan will be installed. A coordinated handoff keeps the design intent intact and gives you a clear reference when the system is put in place. Creative Closets designs, manufactures, and installs residential storage systems across King and Pierce Counties, with service centered on its Maple Valley location. That local scope makes it important to confirm coverage for your address rather than assume the same service area applies everywhere.
Bring in a designer when the pantry needs to work as part of your home’s larger rhythm, not merely hold more items. A thoughtful plan can turn an awkward room into storage that feels intentional from the first grocery trip onward.
Talk with Creative Closets about your pantry design
Frequently Asked Questions
How do I choose the best layout for a walk-in pantry?
Start with the way you move through the room. Identify where groceries enter, which items you reach for most often, and where small appliances or prep supplies should live. Then plan storage across the available walls while protecting a clear path between the door, shelves, and work areas.
How deep should walk-in pantry shelves be?
There is no single depth that suits every pantry. Choose dimensions that keep everyday items visible and reachable without creating a deep, crowded back row. As a planning reference, a documented 12-by-6 walk-in storage example used 24-inch-deep material, but pantry depth should be adjusted for the room, contents, doors, and circulation.
Where should small appliances go in a walk-in pantry?
Store appliances according to how often you use them. Place daily items near a convenient work zone, while heavier or occasional appliances can occupy lower storage or a dedicated section. Adjustable shelves, drawers, and specialty accessories can help separate appliances from food and keep cords, attachments, and supplies easier to retrieve.
When should I work with a pantry designer?
Consider professional design help when the pantry has multiple walls, awkward corners, windows, doors, or competing storage needs. A designer can evaluate circulation, document the room, organize work zones, and show a coordinated plan before installation. Creative Closets provides personalized in-home design and custom 3D planning for storage projects in King and Pierce Counties.
Ready to Plan a Pantry That Fits Your Routine?
A personalized design consultation can help turn your pantry goals into a practical plan for storage, circulation, lighting, and everyday access. Share how you use the space, what you need to store, and where the current layout falls short.
Request a personalized walk-in pantry design consultation with Creative Closets