

A reach-in closet installation is more than replacing a rod and shelf. The best results come from connecting your daily routines to a practical design, confirming every detail before fabrication, and preparing the space so installation day runs smoothly.
Request a free in-home design consultation
Professional reach in closet installation services guide you from an in-home consultation and measurements through layout approval, material and accessory selection, fabrication, careful installation, and a final walkthrough. The process is designed to improve visibility, usable storage, and access while fitting the existing reach-in space.
Before work begins, you can review how the closet will function, decide which belongings deserve the easiest access, and clarify preparation or removal responsibilities. That collaborative planning creates a clearer path from the first design conversation to the finished system. Here is what each stage usually includes.
What Do Reach In Closet Installation Services Include?
Professional reach-in closet installation services connect the design decisions to the finished storage system. Because a reach-in closet has limited depth, a defined opening, and doors that affect access, each stage should account for how the space works in daily use. The process typically moves from an in-home consultation through design approval, fabrication, installation, and a final walkthrough.
Request a free in-home design consultation
Planning Around the Reach-In Opening
The first stages focus on understanding the existing closet instead of forcing a standard arrangement into it. A designer reviews the available wall space, observes how the doors affect access. And discusses what you store, what you reach for most often, and where the current setup creates frustration. In a smaller footprint, those details help determine whether the plan should prioritize hanging, drawers, shelves, shoes, or a balanced combination.
- In-home consultation: You explain your storage goals and routines while the designer reviews the closet in its actual setting. This is also the time to discuss access needs, frequently used items, and any concerns about the existing layout.
- Measurements and layout planning: The space is measured so the proposed components fit the reach-in opening and work with doors, trim, and surrounding walls. The plan should make useful storage visible and accessible without crowding the room.
- Design review and approval: You review the proposed layout, typically through a 3D rendering, and make decisions about materials, shelves, drawers, hanging rods, shoe storage, baskets, or other accessories. Manufacturing begins after the layout and materials receive your approval.
- Fabrication and scheduling: The approved system is prepared for the installation appointment. This stage connects the design to the components that will be assembled in your home. So questions about removal, wall condition, or site access should be clarified before installation day.
- Professional installation and walkthrough: The installation team assembles and aligns the system, works carefully in the surrounding space, and leaves the area clean and finished. A post-install walkthrough gives you the opportunity to check shelves, rods, drawers, and other components, ask questions, and identify any adjustment that may be needed.
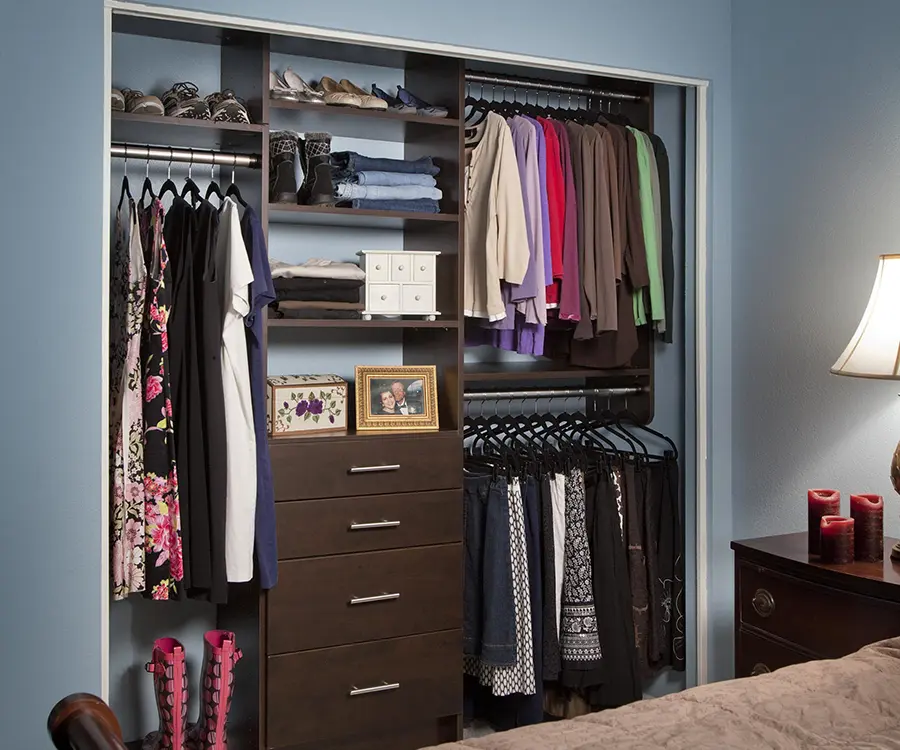
Choosing Storage That Works Every Day
A reach-in system can make better use of vertical space while keeping high-frequency items at eye level or below. Adjustable shelves, divided drawers, wire baskets, slanted shoe shelves, valet rods, hanging rods, and hampers each serve different routines. The right combination depends on the wardrobe and the available opening, not on filling every inch with accessories.
That personalized approach is the main difference between a service-led installation and simply replacing a rod. Explore custom reach-in closet options to see how the system can be planned around your space, access, and daily habits.
What the Final Check Should Cover
Before the project is considered complete, walk through the finished closet with the installation team. Confirm that doors and drawers have clearance, rods and shelves are aligned, and the components you use most are comfortable to reach. This is also the right time to ask how to request a later adjustment if your routine reveals a small change that would improve the setup.
How Does the Design Approval Process Work?
The design approval stage turns a general storage goal into a reach-in closet plan that fits the available wall space and the way you use it. A professional consultation typically addresses the layout, materials, and most efficient use of the closet before anything is manufactured. For Creative Closets, this collaborative review is an important part of the installation service, not an administrative formality.
Start with the space and your daily routine
The process begins with an in-home consultation and precise measurements of the closet. The designer evaluates the usable width, height, depth, door placement, and any features that affect access. You can also explain what currently frustrates you, such as crowded hanging space, inaccessible upper shelves, or a lack of a place for shoes and folded items.
Your routines give the measurements context. The designer may ask which items you reach for most often. Whether you prefer folded or hanging storage, and how much space you need for accessories or seasonal pieces. User height and individual storage needs should influence the configuration. High-frequency items generally work best at eye level or below, while less frequently used belongings can occupy higher areas. The University of Florida IFAS specifically recommends height-adjustable rods when high closet rods could require an unsafe step stool: its accessibility guidance explains how to keep clothing within easier reach.
Review the proposed design in three dimensions
After the consultation, the designer develops a tailored layout and presents a 3D rendering. Seeing the design in three dimensions makes it easier to understand how shelves, drawers. Baskets, hanging sections, shoe storage, and accessories will work together within a confined reach-in footprint. It also gives you an opportunity to notice details that may be difficult to assess from a flat sketch. Such as whether a drawer has a clear path to open or whether a shelf is positioned where you can comfortably use it.
This is the right point to compare alternatives. You might choose between more double-hang space and a larger shelf section, adjust the location of drawers, or reserve a specific area for shoes, bags, or longer garments. Material and finish selections are reviewed alongside the layout so the final system reflects both practical needs and the look you want in the room. The goal is not to fill every available inch indiscriminately. It is to create storage that remains visible, reachable, and useful after installation.
Revise, confirm, and sign off
Questions and revisions belong in the approval stage. Ask about any feature that seems difficult to reach, any clearance that appears tight, and how the proposed arrangement supports the items you plan to store. A careful review can also clarify what happens to existing shelving, whether wall repairs or removal are included, and which decisions must be finalized before manufacturing.
Once the layout, materials, finishes, and accessories are confirmed, you sign off on the approved design. Manufacturing then proceeds from that agreed plan, reducing the risk of surprises during installation. If you are still comparing options, review the reach-in closet design quote guide to understand what information is useful before the consultation. A clear approval protects the details that matter most: comfortable access, an efficient use of the reach-in space, and a finished closet built around your household’s actual routines.
Which Materials and Features Fit a Reach-In Closet?
A reach-in closet has less room to work with than a walk-in, so each component should earn its place. The right combination depends on what you store, how often you use it, and how easily you want to see and reach your belongings. A designer can help balance open storage, enclosed storage, hanging space, and accessories without allowing one feature to crowd out the rest.
Material choices also affect the look and feel of the finished system. Custom reach-in designs may use options such as wood laminates, wire shelving, and other durable finishes. The most useful choice is not necessarily the most decorative one. Consider how the finish fits your room, how the storage will be used each day, and which surfaces will be easiest for your household to keep organized.
| Storage feature. | Useful for. | Planning question. |
|---|---|---|
| Adjustable shelves | Folded clothing, linens, bags, and items that vary in size | What needs to remain visible, and might the shelf spacing need to change later? |
| Divided drawers and wire baskets | Smaller garments, accessories, flexible items, and pieces that are easier to sort in compartments | Which belongings should be contained rather than stacked on an open shelf? |
| Hanging rods and valet rods | Daily clothing, longer garments, and outfits that benefit from temporary staging | Which garments need full hanging length, and which items should stay within easy reach? |
| Slanted shoe shelves | Shoes that need to remain visible and easy to select | Would angled display improve access without taking space from more frequently used storage? |
| Hampers and accessory storage | Laundry sorting, smaller personal items, and the categories that otherwise collect on shelves | Where can these functions fit so they support the routine instead of obstructing access? |
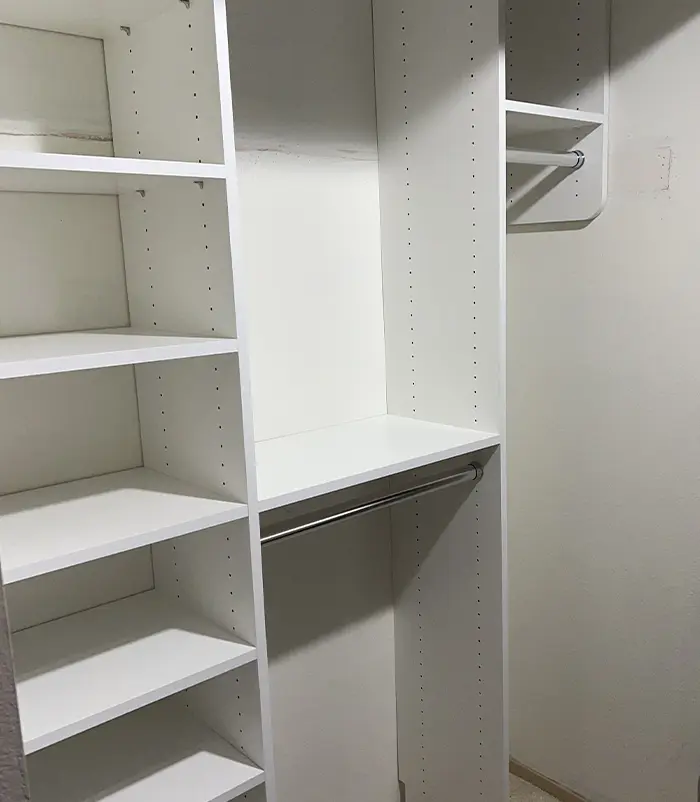
Plan around reach and frequency
Keep high-frequency items at eye level or below when possible. Vertical storage can increase efficiency, but the highest shelf is not automatically the best location for something used every day. The University of Florida IFAS recommends keeping clothing within reach with height-adjustable rods and notes that lowering shelves can improve access and safety: see its reach-in storage guidance. That principle is especially helpful when deciding whether a shelf, drawer, or hanging section belongs in the most accessible part of the closet.
For more ideas about combining these features, explore Creative Closets’ closet storage solutions. Then use your own wardrobe and daily habits to identify which features deserve priority. A thoughtful layout can improve visibility and usable capacity without making a standard reach-in space feel crowded.
How Should You Prepare for Installation Day?
A little preparation helps the installation team work efficiently and helps you make confident decisions about what the finished closet needs to hold. You do not need to perform construction work. Your main role is to clarify your belongings, create a clear work area, and share any access or wall-condition details before the appointment.
-
Take inventory of what you own
Review the clothing, shoes, accessories, linens, or other items that currently live in the closet. Note which categories need more room and which are difficult to see or reach. An inventory is a useful part of wardrobe planning because it connects the storage design to your actual belongings, rather than to an idealized closet. The closet storage solutions guide can help you think through the types of organization that may support your routine.
-
Decide what should return to the closet
Use the inventory to separate everyday items from seasonal pieces, rarely used belongings, and items that no longer belong in the space. You do not have to finish a major decluttering project before installation. A simple decision about what should return to the closet gives the designer and installers a clearer picture of how shelves. Hanging areas, drawers, or accessory storage will be used.
-
Empty the closet and clear nearby space
Remove clothing and loose belongings from the existing system before the team arrives. Clear a path from the entry door to the closet, and move nearby furniture or decor far enough away for installers to work safely. If items are heavy, fragile, or difficult to relocate, mention them in advance instead of trying to move them alone.
-
Protect surfaces and plan access
Discuss how floors, walls, trim, and nearby surfaces will be protected during the work. Confirm the appointment window, entry instructions, parking details, and any building or neighborhood access requirements. Sharing these details early helps the team arrive prepared and supports a clean, respectful job site.
-
Flag wall conditions and confirm removal scope
Tell the design or installation team about loose shelving, damaged drywall, unusual wall surfaces, electrical components, or other conditions they should know about. If an existing closet system must be removed, ask exactly what removal and disposal responsibilities are included. Older shelving can leave minor wall repairs behind, so confirm whether those repairs are part of the scope or need to be arranged separately. You are not expected to repair the wall yourself unless that is specifically your preference and ability.
With the closet emptied, access clarified, and removal expectations documented, installation day can stay focused on fitting and finishing the new system. Keep any final questions about placement or daily use ready for the walkthrough at the end of the work.
How Long Does a Reach-In Closet Installation Take?
The calendar for a reach-in closet project includes more than the time an installer spends in your home. The overall process typically runs about 6 to 8 weeks from the initial consultation through completion. While the on-site installation is typically completed in one day after the materials are ready. These are useful planning expectations, not guarantees, because each home and design follows its own path.
For a helpful overview of the broader workflow, see this general custom closet installation process.
Design, approval, and material lead time
The first part of the schedule is the planning phase. During the consultation, the designer reviews the closet’s dimensions, door and wall constraints, storage goals, and daily routines. The design may then be refined around hanging space, shelves, drawers, baskets, shoes, or accessories. Because a reach-in closet has limited depth and a smaller opening than a walk-in space. The layout needs to work with the way you enter, view, and use the closet.
Before manufacturing begins, you review the proposed design and approve the layout, materials, and selected features. This approval step matters because it gives the project a clear direction before components are prepared. Manufacturing and material availability then become part of the schedule. Questions about finishes, accessories, existing shelving, or any requested changes are best resolved before sign-off to help avoid preventable delays.
What happens on installation day?
Once the materials are ready and the home is prepared, the installation team completes the work on site. Installation is typically a one-day visit for the system itself. The exact experience can vary based on the size and configuration of the closet, the condition of the walls. Access to the work area, and whether removal of existing components or other preparation is included in the project scope.
The team should have enough room to work safely and bring the system together accurately within the existing space. After the components are installed, a walkthrough gives you an opportunity to check that rods, shelves, drawers, and other features operate as intended and to raise any questions.
Factors that can affect the schedule
- Design revisions or a delayed layout and material approval.
- Material readiness and the availability of selected components.
- Existing shelving that needs to be removed, or wall conditions that need attention.
- Closet dimensions, configuration, and the complexity of the chosen storage plan.
- Home access, parking, or other site conditions that affect the installation visit.
Ask for the expected milestones at your consultation, including approval, material readiness, installation, and final walkthrough. A clear schedule helps you plan the room without treating a typical timeframe as a promise.
What Happens After the Closet Is Installed?
Installation is not complete when the last component is secured. The final walkthrough gives you and the installation team a chance to review the finished reach-in closet together. Confirm that the layout matches the approved plan, and identify anything that needs attention before the team leaves.
Start by looking at the system as a whole. Check that panels and shelves appear level, edges are aligned, and the components sit properly within the available wall and door space. In a reach-in closet, small alignment details matter because the system must work within a compact footprint. Open and close every drawer, pull each basket fully, and test that shelves feel secure during ordinary use.
Test the parts you will use every day
Walk through your normal routine rather than inspecting the closet only from the doorway. Move a few garments onto the hanging rods and confirm that they are easy to access. Check that drawers operate smoothly, rods are positioned at useful heights, and shelves leave enough room for the items you plan to store. If a frequently used item is difficult to reach, mention it during the walkthrough. Storage decisions should reflect the people using the closet, including their height, routines, and most common tasks.
Accessibility is worth considering at this stage as well as during design. University of Florida guidance recommends keeping clothing within easy reach and lowering storage shelves when that improves access and safety. A final review can reveal whether a small adjustment would make everyday use more comfortable, especially for high-frequency clothing and accessories. Read the University of Florida’s closet accessibility guidance for additional planning context.
Ask questions and record anything that needs follow-up
Use the walkthrough to ask how to care for the finished surfaces and how each feature is intended to operate. If a drawer front needs alignment, a shelf needs repositioning, or a rod or accessory does not function as expected, point it out clearly. Minor touch-ups or adjustments are easier to address when they are identified while the installation details are still fresh.
If you notice an issue later, document it promptly. Take a clear photo, note the affected component, describe what happens when you use it, and record when you first noticed the problem. Contact the Creative Closets team with those details so they can understand the request and determine the appropriate next step. Avoid making your own modifications before asking, since changing hardware or drilling into the system can make diagnosis more difficult.
For visual ideas on how different layouts and accessories can work in a compact space, explore these reach-in closet design ideas. The best post-install result is a closet that feels straightforward to use, not merely one that looks organized on installation day.
Request your free in-home design consultation
Frequently Asked Questions
What is included in professional reach-in closet installation services?
A professional project typically moves from consultation and measurements to layout and material decisions, design approval, fabrication, installation, and a final walkthrough. The walkthrough is a chance to check that shelves, rods, drawers, and other selected features operate as intended and to identify questions or adjustment needs.
How long does the reach-in closet installation process take?
The full project usually takes longer than the on-site work because it includes consultation, design approval, material preparation, and scheduling. Creative Closets describes six to eight weeks as a typical overall expectation, while installation is typically completed in one day once materials are ready. Timing can vary with project complexity, material availability, and any removal or wall-repair needs.
How can I prepare my home for a reach-in closet installation?
Start by taking inventory of what you want the closet to hold, then remove clothing and belongings before installation day. Clear access to the closet, protect nearby items, and confirm parking or entry details with the installer. Ask in advance whether removal of existing shelving and minor wall repairs are included, since those needs can affect preparation and scheduling.
What materials and features can be used in a custom reach-in closet?
Options may include adjustable shelves, divided drawers, wire baskets, hanging rods, valet rods, slanted shoe shelves, and hampers. The best combination depends on what you store and how you use it. During design, discuss which items need frequent access, and consider keeping high-frequency storage at eye level or below for easier reach. University of Florida guidance also recommends height-adjustable rods to reduce the need for unsafe step stools.
Does installation include demolition or later adjustments?
Not every project has the same removal or repair scope, so confirm those details before approval. After installation, use the walkthrough to discuss alignment, operation, and any finish concerns. If an adjustment is needed later, document the specific shelf, rod, drawer, or accessory and contact the provider to ask about the next step.
Ready to Plan Your Reach-In Closet Installation?
A thoughtful design consultation can help you organize the layout around your wardrobe, routines, and available space before installation begins. You can review practical options, clarify preparation questions, and decide on the next step with a clear understanding of the process.