

A laundry room works harder when storage is planned around the machines, not added wherever an open wall remains. For homeowners in King and Pierce Counties, a well-designed cabinet layout can make room for detergent. Folding, hanging, and cleaning tasks while keeping doors, vents, utilities, and service access usable.
Schedule a laundry room planning consultation.
Well-planned laundry room wall cabinet systems coordinate cabinet height and depth with appliance requirements, utility connections, ventilation, door swing, and working space. They also divide storage into practical zones, using materials, finishes, and hardware suited to the room’s everyday demands.
The most reliable starting point is not a cabinet catalog or a fixed measurement. It is a careful look at how your appliances fit, where they need clearance, and what must remain accessible for maintenance. That coordination determines the layout choices that follow.
How Should You Plan Appliance Clearance for Wall Cabinets?
Appliance clearance is a coordination exercise, not a single universal dimension. The right layout depends on the washer and dryer models, how their doors open, where utilities enter the room, and how much access is needed for maintenance. Plan the cabinets around the complete appliance setup rather than treating the machines as simple boxes.
Start by identifying the appliance type and configuration. A front-load pair may need room for doors to swing and for you to stand comfortably while loading and unloading. A top-load washer needs usable space above the lid. Stacked units create a different reach and service-access pattern than side-by-side machines. Record the manufacturer and model numbers, then keep the installation guides available for the designer. Manufacturer requirements should guide the final layout.
Account for doors, vents, and utilities
Measure the path of every moving part, including appliance doors, cabinet doors, drawers, and the washer lid. A cabinet that fits on the wall can still interfere with a door swing or make a drawer difficult to use. Note the location of the water connections, drain, electrical outlet, gas connection if applicable, and dryer vent. Cabinets should not conceal an access point or make it difficult to reach a shutoff.
Venting deserves special attention. The dryer vent route can affect both cabinet placement and available wall space. Do not assume that a shallow-looking area is available for storage until the vent path and its access needs are confirmed. Likewise, identify baseboards, trim, windows, sloped ceilings, wall transitions, and any uneven surfaces that could change the usable cabinet area.
Measure for service access before approving the design
Leave enough practical access to inspect connections, clean around the appliances, and pull a unit forward when service is required. The amount of room needed will vary by appliance and installation conditions, so the design should be checked against the actual equipment rather than a generic diagram.
Take measurements at several points, including wall width, ceiling height, appliance height, depth, and the space above and beside each machine. Record obstacles with photos and mark where doors, vents, and utilities sit. Creative Closets documents custom-height construction and multiple depths, which supports planning cabinet dimensions around the room and its obstacles rather than forcing the room into a standard layout. Its custom laundry room cabinets service also reflects the value of professional measurement and design coordination.
Before design approval, review the measured plan with the appliance specifications and utility locations together. Confirm that every door opens, each connection remains accessible, and the finished cabinet arrangement leaves a workable service path. This check is what turns a good-looking wall into a practical system for daily laundry tasks.
What Storage Zones Belong in a Laundry Room Wall Cabinet System?
The most useful laundry room wall cabinet systems are organized around the work you do, not just the wall space available. Separating supplies, folding, hanging, cleaning, and overflow gives each task a logical home. It also makes it easier to choose cabinet components that support your routine instead of filling the room with storage that is difficult to reach or rarely used.
| Zone | Useful components | Planning question |
|---|---|---|
| Supplies | Adjustable shelves or drawers | What do you reach for most often? |
| Folding | Clear counter or work surface | Where can clean clothes land without blocking appliance access? |
| Hanging | Rod or open section | Where can garments air-dry without interrupting movement? |
| Cleaning | Accessible cabinet or dedicated storage | Which tools need quick access, and which can be stored higher? |
| Overflow | Tall storage or less accessible shelves | Which seasonal or backup items can move out of the main work zone? |
Keep everyday supplies easy to reach
Start with the products you use most often, such as detergent, stain treatments, and laundry accessories. Adjustable shelves can help accommodate containers of different sizes and allow the interior to change as your routine changes. Drawers are another option for smaller items that can otherwise become scattered across a counter or open shelf. The exact combination depends on the available wall area, the appliances, and how much you prefer to keep behind closed doors.
Create a dedicated folding zone
A folding area works best when it has a clear surface and nearby storage for items waiting to be put away. Cabinets can frame or complement a folding station while keeping related supplies close at hand. If the room serves more than one purpose, plan this zone so cabinet doors, drawers, and appliance access remain comfortable during normal use. A well-coordinated layout can make the folding step feel like part of the room’s workflow rather than an activity that takes over every available surface.
Plan for hanging and cleaning tasks
A hanging rod can provide a convenient place for air-drying garments or moving clothes directly from the dryer. It may fit beneath or between cabinet sections, depending on the layout. Cleaning tools need their own consideration as well. Keep frequently used items accessible, while reserving less convenient spaces for supplies that are used occasionally. Hampers can also help separate sorting from the rest of the laundry process, although they are not necessary for every project.
Use tall storage for overflow
Reserve the less accessible areas for bulkier or less frequently used items, such as extra linens, seasonal supplies, or backup products. Tall storage can use vertical space without crowding the primary folding and sorting areas. For more ideas about this specific planning decision, see these laundry room tall storage cabinets.
There is no single component list that fits every laundry room. A practical design begins by mapping the sequence of tasks, then assigning shelves, drawers, rods, hampers, and tall storage where they will remove friction from that sequence. Explore additional laundry room storage ideas as you compare possible zones and layouts.
Which Materials and Finishes Work Best in a Laundry Room?
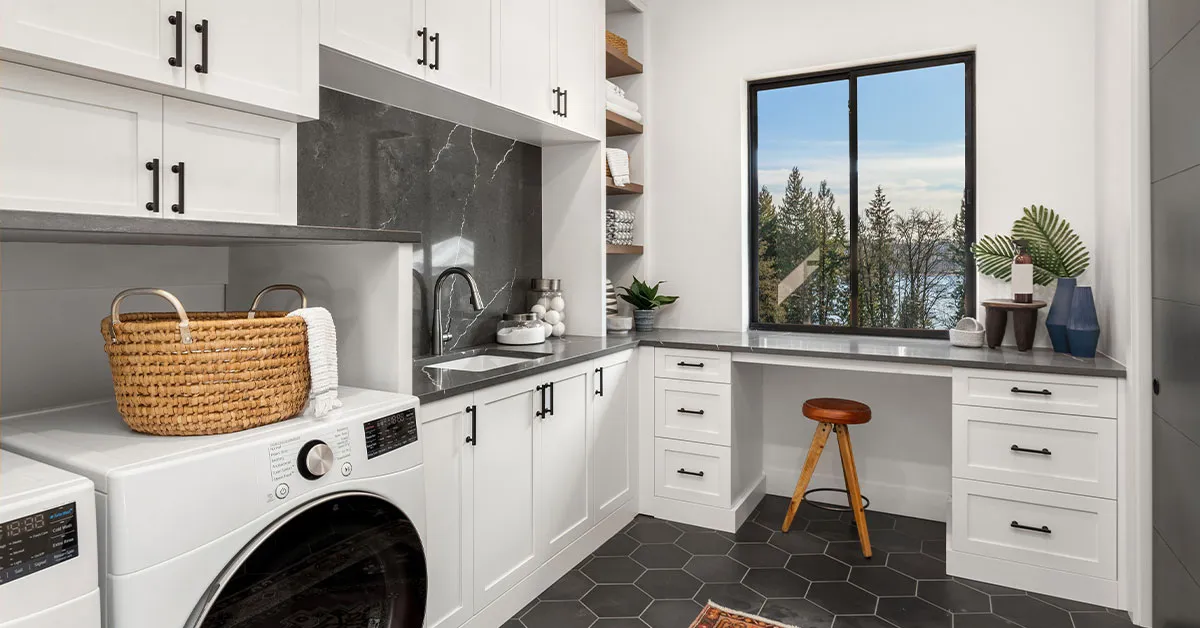
Material selection for laundry room wall cabinet systems should begin with the room’s actual conditions, not a promise that one cabinet material works everywhere. Laundry rooms can experience warm air, condensation, detergent spills, and occasional leaks. The right conversation is how the cabinet construction, edge treatment, and finish will suit the space and how the room will be maintained.
Start with moisture management
Cabinets are only one part of a moisture-aware laundry room. Confirm that the room has practical ventilation, and make sure the dryer venting is installed and maintained according to the appliance and home’s requirements. Check around supply lines, drain connections, the washer, and utility sink for signs of leaks before finalizing the design. The U.S. Environmental Protection Agency’s moisture guidance emphasizes controlling moisture and improving ventilation as part of mold prevention: learn more about controlling moisture in your home.
Ventilation and humidity also influence comfort in occupied work areas, as OSHA notes in its guidance on the work environment. That does not create a cabinet performance rating, but it reinforces the value of considering airflow and humidity when planning the room: OSHA’s ventilation and humidity guidance.
Keep the design practical. Avoid placing storage where it blocks a vent, interferes with appliance doors, or makes plumbing and electrical access difficult. Leave enough visibility and access for routine inspection of connections and equipment. If the room has a history of leaks or persistent condensation, address that underlying condition before installing new cabinetry.
Choose a finish you can live with
In a busy laundry room, smooth, wipeable surfaces can make everyday cleanup easier. Ask how the selected material and finish handle common conditions in your room, including detergent residue, damp hands, and cleaning products. A finish may be attractive and easy to clean without being described as waterproof. So ask the designer to explain its suitability for the planned location rather than relying on broad labels.
Color and finish decisions should also support the room’s lighting and workflow. A lighter finish can help a compact room feel brighter, while a deeper tone may coordinate with flooring or appliances. Creative Closets documents color consultation and a range of standard and custom finish options as part of its design process. Review samples in the context of your room, then confirm the final selection before fabrication.
When discussing custom laundry room cabinets, bring up moisture exposure, ventilation, dryer venting, leak history, cleaning habits, and access needs. A careful designer can then recommend materials and finishes for the specific conditions, while coordinating cabinet placement with appliances, utilities, and service access.
How Do Hardware Choices Improve Daily Laundry Workflow?
Hardware is not just a finishing detail. It determines how naturally you can reach supplies, open a cabinet, move clean clothing, and keep the room clear during a busy laundry cycle. The best choices follow the way you use the space, rather than treating every cabinet opening as interchangeable.
Start with door style and reach. A cabinet placed above a counter may need an opening that is easy to access without interfering with the work surface, nearby appliances, or an adjacent door. Consider where your hands naturally land, how far you want to reach, and whether an open door could interrupt movement through the room. Pull placement should support that motion and remain comfortable for the primary users.
Drawers can make frequently used items easier to see and retrieve than stacked shelves. They are useful for sorting smaller supplies or grouping items that would otherwise disappear behind taller containers. Adjustable shelves offer a different advantage: they can be repositioned as bottles, baskets, and household needs change. Together, drawers and adjustable storage help the system adapt instead of forcing every item into a fixed location.
Hanging rods support a separate step in the workflow. They provide a place to air-dry garments or hold clothing briefly after it comes out of the dryer. A rod is most useful when its location leaves enough room to reach the clothing without blocking the folding area or appliance access. The designer should also consider the path between the washer, dryer, folding surface, and hanging zone.
Hampers can reduce trips across the room when they are positioned near the point where clothing is sorted. Depending on the layout, a hamper may sit in a lower cabinet, beside the appliances, or within a dedicated storage zone. The important question is whether it is easy to open, remove, and return during regular use. Accessories should solve a repeated task, not simply fill available space.
Planning these details together is especially helpful for custom laundry room cabinets. Creative Closets documents accessory selection and hardware preparation as part of its process. Allowing the final design to account for the selected doors, drawers, rods, pulls, and hampers before installation. A careful review also confirms that hardware remains reachable and service access is not accidentally restricted.
Bring your everyday routine into the design conversation. Identify what you reach for most, what needs to hang, what should stay concealed, and which areas need the least bending or stretching. Those answers create a hardware plan that makes laundry feel more orderly without adding unnecessary complexity.
How Does Installation Coordination Prevent Surprises?
A smooth installation depends on decisions being confirmed in the right order. For laundry room wall cabinet systems, that means coordinating the room, appliances, utilities, finished design, materials, and installation plan before anything is cut or attached. A clear process reduces last-minute changes and gives you a better sense of what needs to happen before installation day.
- Verify the room measurements. The team completes a final measurement check, including wall lengths, ceiling height, corners, openings, and any obstacles that affect cabinet placement. Custom cutting only helps when the measurements reflect the room as it exists, not an earlier sketch.
- Confirm appliances and utilities. Identify the exact locations of the washer and dryer, water connections, drain lines, electrical outlets, vents, doors, and service access. Manufacturer requirements and access needs should be confirmed before cabinet dimensions are finalized. If an appliance, utility, or wall condition is changing, tell the designer before approval.
- Approve the design. Review the planned cabinet arrangement, storage zones, clearances, and reach points. Creative Closets documents space planning and 3D visualization as part of its design services, which can help you understand how the finished arrangement will fit the room. Approve the design only after the layout reflects how you work in the space.
- Confirm finishes and accessories. Check the selected colors, finish choices, shelves, drawers, hanging features, hampers, and other accessories. Accessory planning is part of the documented process, so use this stage to resolve small decisions that would otherwise become installation-day questions.
- Prepare the walls and cut the components. Custom components are cut for the approved plan, and the required hardware is prepared. The wall is checked for repair or surface-preparation needs. Homeowners can help by completing any separately agreed remodeling work, clearing the access path, and communicating changes to plumbing, electrical, paint, flooring, or appliances before the crew arrives.
- Complete quality control and scheduling. Components and hardware are reviewed against the approved design, then the installation is scheduled around product readiness and site conditions. Most Creative Closets projects are documented as completed in one day, but that is not a universal promise. Scope, access, wall conditions, and other site details can affect the schedule. Custom laundry room cabinets are coordinated as a project, not treated as a one-size-fits-all package.
- Stage and install the system. The installation area and materials are staged, then the prepared components are installed according to the approved layout. Keeping the room accessible and having appliances and utility decisions settled helps the crew work efficiently and limits avoidable interruptions.
- Walk through the finished room. Review the cabinet alignment, doors, drawers, shelves, accessories, and overall function with the installation team. This is the right time to ask questions and identify anything that needs attention before the crew leaves.
- Remove debris and clean up. Debris removal and cleanup are included in the documented installation operations. The goal is to leave you with an organized, usable laundry room and a clear understanding of the finished system.
Schedule a consultation to plan your laundry room wall cabinet system.
How Do Laundry Room Wall Cabinet Systems Come Together?
The best fit starts with decisions that reflect how you use the room, not with a standard cabinet arrangement. Before approving a design, walk through the checklist below. It will help you identify what needs to be measured, confirmed, and discussed so the finished system supports your appliances, routines, and storage priorities.
- Measure the room and its obstacles. Record wall lengths, ceiling height, doors, windows, trim, outlets, plumbing, vents, and any uneven surfaces. Cabinet dimensions should respond to the room, including its obstacles, rather than forcing the room into a preset layout. Professional measurement and space planning are useful safeguards before anything is finalized.
- Gather appliance specifications. Note the make and model of the washer and dryer, door swing, controls, vent location, water connections, drain, and service access. Confirm the manufacturer’s requirements before deciding cabinet height, depth, or placement. The goal is coordinated storage, not a tight installation that makes routine maintenance difficult.
- Map storage zones. Decide where detergent and supplies belong, where folding happens, what needs to hang, and how cleaning items or overflow should be stored. Adjustable shelves, drawers, hanging rods, and hampers can support different parts of the workflow. Choose each component for a specific task and the reach of the people using it.
- Discuss moisture and ventilation. Identify how air moves through the room and where the dryer vent and other heat or moisture sources are located. Ventilation and humidity can affect comfort, so material and finish choices should be reviewed in that context. Ask the designer which options suit your room rather than assuming any cabinet material is universally moisture-proof.
- Review finishes and hardware together. Bring the desired look into the practical conversation. Confirm the finish, door style, pulls, drawer access, shelf configuration, rods, and hampers as one coordinated plan. Color consultation and accessory planning are documented parts of the design process, helping the final choices feel intentional instead of added at the end.
- Get approval before production. Review the layout and 3D visualization, then confirm the design, colors, and accessories in writing before fabrication or installation coordination. Ask what must be ready at the wall, appliance, and utility locations, and clarify the access path and schedule.
Creative Closets brings space planning, professional measurement, 3D visualization, color consultation, and accessory planning into the process for homeowners across King and Pierce Counties. A careful review at this stage makes it easier to decide whether a wall cabinet system fits your workflow and what should be resolved before the installation is scheduled.
Frequently Asked Questions
What are the best wall cabinets for a laundry room?
The best cabinets match your room, appliances, and laundry routine. A well-planned system may combine adjustable shelves for supplies, drawers for smaller items, hanging space for garments, and a dedicated area for cleaning tools. The right mix depends on available wall space, reach, appliance placement, and whether you need folding or overflow storage.
How do I choose the right cabinet depth and height?
Start with the appliances, doors, vents, utilities, and the access needed for future service. There is no single depth or mounting height that works in every laundry room. Professional measurement helps establish dimensions around obstacles while keeping everyday items reachable and preserving comfortable movement through the room.
How should laundry cabinets be planned for moisture?
Discuss the room’s ventilation, dryer-vent routing, and likely exposure with your designer before selecting finishes and materials. Laundry rooms need moisture-aware planning, but cabinets should not be described as waterproof or universally humidity-rated unless the specific product documentation supports that claim. Finish suitability and practical cleaning should be part of the design conversation.
Should laundry room wall cabinets have doors?
Doors can keep frequently used supplies visually contained and help create a cleaner appearance. Open shelving may be more convenient for items used every day. Consider reach, cabinet location, door swing, appliance clearance, and whether drawers or hampers would make sorting and folding easier before finalizing the combination.
How is installation coordinated?
The process should include final measurement verification, appliance and utility confirmation, design approval, finish and accessory confirmation, wall preparation, hardware preparation, scheduling, and a walkthrough. Confirming the site conditions and final component list beforehand reduces surprises and helps the installation team arrive prepared.
Schedule Your Laundry Room Cabinet Consultation
A thoughtful consultation can turn appliance requirements, storage zones, materials, and installation details into one coordinated plan for your space. Creative Closets can help you evaluate the room, refine the layout, and plan a custom laundry room wall cabinet system that supports your daily routine.