

A well-planned closet project is more than choosing shelves and hanging space. For homeowners in Bellevue, Renton, Kent, Issaquah, and other King County communities. The process should connect the way you use the room with accurate measurements, practical features, and a clear installation plan.
Custom closet installation in King County typically begins with an in-home consultation, where a designer measures the space, discusses your storage needs, and builds a live 3D plan. After you approve the design and details, the project moves through preparation, fabrication, scheduling, professional installation, cleanup, and a final quality review.
Request an in-home consultation
Knowing what happens at each stage makes it easier to prepare your home, ask useful questions, and make decisions before fabrication begins. The first step is a collaborative visit that turns everyday frustrations, awkward corners, and unused space into a layout designed around your household.
What Happens During a Custom Closet Installation in King County?
The process starts in your home, not with a one-size-fits-all package. Creative Closets serves homeowners across King County communities such as Bellevue, Renton, Kent, Issaquah, Sammamish, Maple Valley, Kirkland, Redmond, and Federal Way, subject to service-area confirmation. The goal is to understand how your household uses the space before recommending a layout.
For a closer look at the first visit, see this in-home closet design consultation guide.
That first appointment follows an in-home showroom model and typically takes 60 to 90 minutes. A designer can discuss your storage goals, measure the room, show design options, and review pricing during the same visit. If you are comparing ideas before the appointment, this in-home closet design consultation guide offers useful context on what to expect.
Measurements that account for the room
Good design depends on more than the length and width of a closet. Designers take laser-accurate measurements and assess wall types, electrical conditions, obstacles, corners, and unused vertical space. These details help determine where components can be mounted and how to use the room without interfering with doors, switches, trim, or walkways.
It is also helpful to identify what the closet must hold. The conversation can cover current storage problems, clothing and accessory inventory, seasonal items, and future needs. For example, one household may need more long-hang space, while another may benefit from drawers, shoe storage, or better use of an awkward corner. The plan should reflect the people using the closet, not just the dimensions on a measuring tool.
A live design you can revise
Once the designer understands the room and your priorities, the layout is shown as a live 3D model. You can see how the proposed system fits the space and make changes in real time. That might mean adjusting shelf spacing, changing hanging lengths, moving drawers, or considering accessories such as jewelry organizers, mirrors, seating, an island, or lighting.
This collaborative stage is where many practical decisions become easier. You can compare how much open storage and closed storage you want, discuss finishes, and select from nine colors and multiple finishes. Rather than approving a vague sketch, you are responding to a visual plan and refining it with the designer.
Approval before fabrication
After the design is settled, the project moves toward final measurement verification and design approval. Color and accessory selections are confirmed, and the next operational steps can include deposit collection, custom cutting, hardware preparation, packaging, and quality-control inspection. Taking time to resolve questions before fabrication helps keep the installation aligned with the approved plan.
Whether the project is a walk-in, reach-in, or another residential storage area, the King County process is intended to be transparent from the first measurement through final approval. You should know what is being designed, why it fits your routine, and which decisions need to be confirmed before installation is scheduled.
How Should You Choose Materials and Storage Features?
Material selection is easier when you begin with how the closet needs to work, rather than choosing a finish first. Consider what you store, how often you reach for it, and which items need visibility, protection, or extra support. A frequently used wardrobe may benefit from accessible hanging space and open shelves, while seasonal items can be assigned higher shelves or less prominent corners.
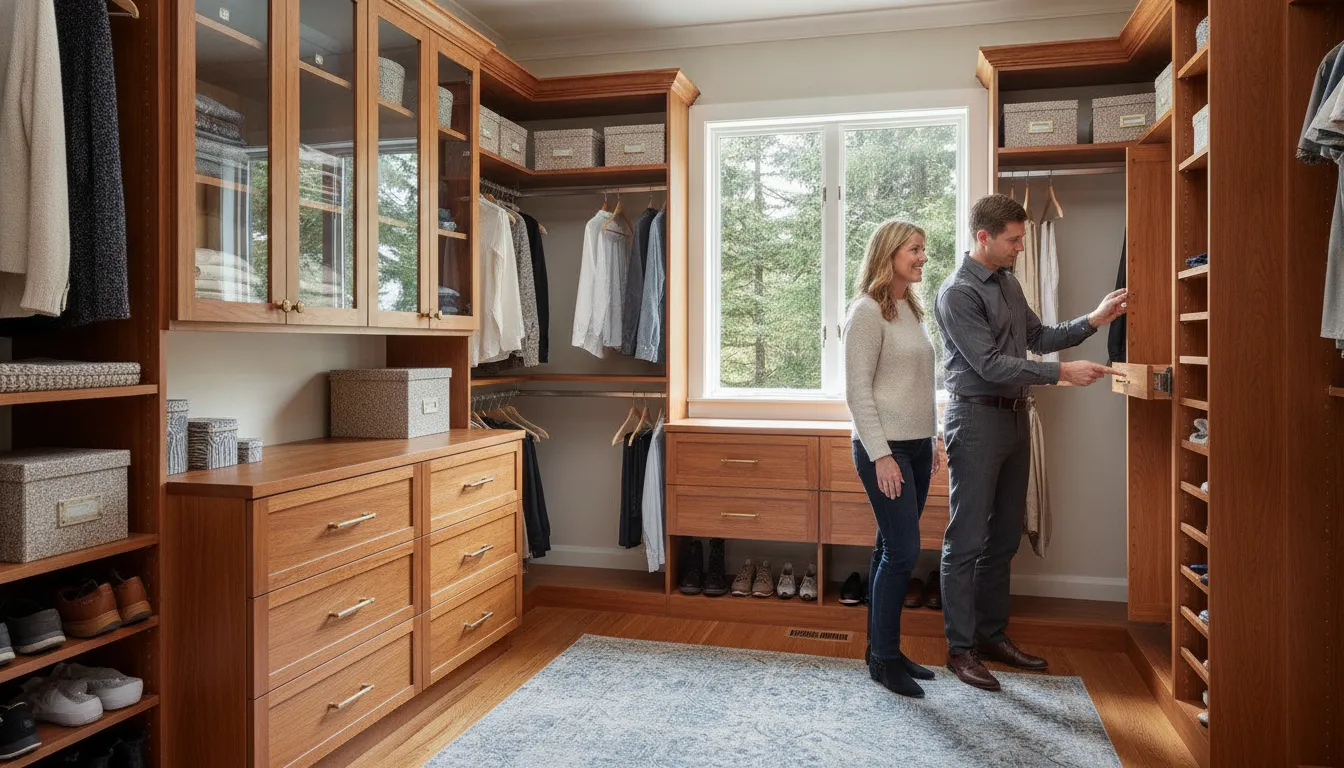
During a design conversation, ask to see the available colors and finishes together. Creative Closets offers nine colors and multiple finishes, giving homeowners room to coordinate the system with flooring. Trim, doors, or the broader style of a Bellevue, Renton, or Maple Valley home. The goal is not simply a matching surface. It is a combination that remains visually comfortable as your storage needs change.
Start with the material and finish questions
Ask what each component is made from, where it will be used, and how the selected finish will be maintained. Pressed-wood products can include particleboard, hardwood plywood, and medium-density fiberboard. The US Environmental Protection Agency explains that these materials are commonly used in shelving, cabinetry, drawer fronts, furniture tops, and related indoor products. Its overview also notes that pressed wood made with phenol-formaldehyde resin generally emits formaldehyde at lower rates than products made with urea-formaldehyde resin. That is useful general context when discussing indoor materials, but it should not be treated as a claim about a specific closet system without product documentation. Read the EPA’s formaldehyde and indoor-air-quality guidance and ask your designer any product-specific questions.
Match storage features to real routines
| Storage priority | Features to discuss | Planning question |
|---|---|---|
| Daily clothing | Hanging zones, shelves, drawers | What do you reach for most often? |
| Shoes and accessories | Shoe storage, jewelry organizers | Which smaller items need visibility? |
| Walk-in comfort | Island, seating, mirror, lighting | How should the room support dressing? |
Next, divide the space by function. Choose hanging lengths and rod placement around the clothing you actually own. Set shelf spacing for folded garments, bags, linens, or boxes instead of accepting one uniform configuration. Drawers can keep smaller items contained, while shoe storage should reflect the number and type of pairs you need to access. Jewelry organizers are useful when small pieces otherwise disappear into drawers or countertop containers.
Walk-in spaces may have room for an island, seating, a mirror, or lighting options. Those features can make dressing and organizing more convenient, but they also affect circulation and sightlines. In a reach-in closet, the same priorities may lead to a more focused combination of rods, shelves, drawers, and accessories. For additional planning ideas, review these custom closet shelving options.
Bring an inventory of difficult items to the design appointment, including long garments, tall boots, luggage, folded sweaters, and accessories. A live 3D model allows homeowners to make real-time changes before approval, so use that opportunity to test shelf heights, drawer locations, lighting, and clearances. The strongest material plan is the one that supports daily habits, fits the room’s conditions, and leaves a clear record of the choices approved before fabrication.
How Do You Prepare Your King County Home Before Installation?
A smooth installation starts with a clear plan for the room, the people using it, and the work area itself. Whether your home is in Bellevue, Renton, Kent, Issaquah, or another King County community, these steps help your designer and installation team work from the same approved information.
- Clear the closet and sort what belongs there. Remove clothing, shoes, bins, and other items before the installation date. As you empty the space, group the items you intend to keep and note anything that needs a special home. Such as long garments, folded sweaters, luggage, or accessories. This inventory gives you a practical reference when reviewing shelf spacing, hanging lengths, drawers, and other storage features. It also prevents an attractive design from overlooking the way you actually use the closet.
- Identify obstacles and conditions that could affect the layout. Point out outlets, switches, vents, doors, trim, sloped ceilings, uneven walls, and any plumbing or electrical features near the work area. Designers assess wall types, electrical conditions, corners, vertical space, and other obstacles during the measurement process. Sharing changes to the room early is important because custom components are prepared for the approved design rather than selected from a generic kit.
- Plan the route into the home. Decide how installers will reach the room and where materials can be staged. Clear a path through entryways, hallways, stairs, and the room itself. Protect or move fragile items near the route, and make arrangements for pets or other household considerations. If parking, building access, an elevator, or a community entry procedure is relevant, confirm those details in advance so the team can plan around them.
- Review the final measurements and design before approval. Pre-installation work includes final measurement verification and design approval. Review the layout carefully, including the location of shelves, rods, drawers, shoe storage, and any other selected accessories. Ask questions while changes are still practical. A live 3D design can make it easier to evaluate the arrangement and request revisions before custom cutting, hardware preparation, packaging, and quality-control inspection begin.
- Confirm colors, finishes, and accessories in writing. Creative Closets offers nine colors and multiple finishes, so verify the selections that will be used for your project. Confirm accessory placement and any details that changed during the design review. The documented pre-installation process also includes deposit collection and confirmation of colors and accessories. Keep your approved information available so there is a shared reference before fabrication moves forward.
- Clarify removal and wall-preparation responsibilities. Ask what happens to an existing closet system, personal items, baseboards, or other features that may be affected. Creative Closets documents removal and disposal of an existing closet system. Spackling and preparation of mounting surfaces, installation, and cleanup or debris removal as part of its installation services. Confirm the exact scope for your room, especially if you expect repairs beyond ordinary mounting-surface preparation. Washington’s Department of Labor & Industries recommends being an informed consumer when hiring someone to work on your property, including understanding the project plan and scope. Review Washington L&I’s contractor-planning guidance as you compare responsibilities and approvals.
Once these details are settled, the installation team can arrive with a defined work area and an approved plan. You can then focus on the final walkthrough rather than making last-minute decisions about what belongs in the room.
How Long Does Custom Closet Installation Take?
There is no single calendar that fits every closet project in King County. A straightforward reach-in system and a larger walk-in with drawers, accessories, lighting, or an island may require different preparation and installation plans. The schedule also depends on when measurements are confirmed, the design is approved, components are fabricated, and an installation date is available.
Creative Closets’ typical operational sequence places manufacturing in weeks 2 through 5, followed by installation scheduling in weeks 5 through 6. This sequence is a planning guide, not a universal promise. A project can move differently when the scope changes, approvals take longer, materials require additional preparation, or scheduling conditions shift. During the consultation, it is useful to ask which milestones apply to your specific room and what could affect the proposed date.
What happens before installation day?
The process begins with measurements and design decisions rather than with fabrication. Designers assess wall types, electrical conditions, corners, obstacles, and available vertical space. They also discuss how you use the room, including daily clothing, seasonal items, shoes, and future storage needs. These details help determine the layout and the mix of hanging areas, shelves, drawers, or other features.
Creative Closets completes an in-home consultation, 3D design, and pricing in one 60-90 minute appointment. Customers can make real-time changes while viewing the design, which gives them an opportunity to resolve questions before production. After final measurement verification and design approval, the company confirms colors and accessories, prepares hardware, custom-cuts components, packages the materials, and completes quality-control inspection. Revisions made before fabrication are generally easier to incorporate than changes requested after materials are prepared.
How long does installation itself take?
Most Creative Closets projects are completed in one installation day, although that is not an absolute guarantee. Installation time varies with room type, system size, wall conditions, removal requirements, and the number of components. A project may include removal and disposal of an existing closet system, spackling and preparation of mounting surfaces, installation, and cleanup or debris removal. Those tasks are part of the overall service scope and can influence the day’s work.
For homeowners comparing reach-in closet installation with a more extensive walk-in project, the best estimate comes from the approved design and verified measurements. Ask for the expected manufacturing window, the scheduling window, what needs to be ready before the crew arrives, and how changes would affect timing. That conversation creates a clearer plan without turning a typical sequence into a promise for every home.
What Should You Check on Installation Day?
Installation day should feel organized from the moment the crew arrives. The first step is material and tool staging, followed by a walkthrough with you to confirm the space, the planned work, and any final details. Creative Closets uses a red carpet as a signature welcome detail, but the more important point is clear communication before work begins.
Use that opening walkthrough to confirm which closet or storage area is included, where materials will be placed, and what will happen to the existing system. If you are replacing older shelving or rods, removal and disposal can be part of the installation service. Confirm the removal scope before work starts so there is no uncertainty about which components stay, which are removed, and how the area will be left.
Confirm the walls are ready for the new system
Mounting surfaces deserve attention before components are secured. Installation services include spackling and preparation of mounting surfaces, which can help address the wall conditions left by a previous closet system. Ask the installer to point out any areas that need preparation and confirm that the planned mounting locations match the approved layout.
This is also a useful time to compare the physical space with the design you approved. Check the location of major sections, shelves, hanging areas, drawers, and other accessories. A quick review can catch a misplaced component before the installation is complete. For more context on the service itself, see these reach-in closet installation services.
Inspect alignment and operation as the work progresses
As the system takes shape, look for level shelves, aligned vertical panels, and consistent spacing. Open and close drawers, doors, and other moving components. Test hanging hardware and pull-out features if they are part of your design. The goal is not to judge the project by appearance alone. Each component should also operate as intended without rubbing, binding, or interfering with an adjacent feature.
Most projects are completed in one day, although the exact experience depends on the scope and conditions of the individual project. Before the crew leaves, the final walkthrough should cover the completed layout, component operation, and any questions you have about using the space. Installation includes cleanup and debris removal, so confirm that packaging, removed materials, and work debris have been addressed.
Keep your quality and warranty documentation
Save the approved design information and any installation documentation with your project records. Creative Closets documents a lifetime guarantee on wood components and a lifetime workmanship warranty. Review the lifetime guarantee details so you understand the coverage and retain the right information if a future question arises. A careful final review, paired with clear documentation, gives you a practical record of what was installed and how the finished system was checked.
What Questions Should You Ask Before Hiring an Installer?
Before choosing an installer for custom closet installation in King County, ask questions that reveal how carefully the company plans, builds, and finishes the work. A polished design matters, but accurate field measurements, clear responsibilities, and a documented approval process matter just as much. Washington State Department of Labor & Industries recommends planning the project, interviewing contractors, reviewing written bids, and verifying contractor information before hiring. Washington L&I’s Hire Smart guidance is a useful starting point.
How will you measure and approve the design?
Ask who takes the measurements, what they inspect, and how those measurements affect the final layout. A thorough visit should account for wall conditions, corners, obstacles, electrical considerations, and available vertical space, not just the width of the closet. Ask whether the design reflects how you store clothing, shoes, seasonal items, and accessories.
Then ask a more specific question: “What happens if I want to change the design?” Find out whether revisions can be made while reviewing a 3D model. And confirm the point at which changes are no longer practical because components have entered fabrication. Before custom cutting begins, request confirmation of the final measurements, layout, colors, finishes, and accessories. This written or clearly documented approval helps prevent an unexpected result.
What materials, finishes, and features are included?
Ask what material is used for the shelving, cabinets, drawers, and other components. You should also understand the finish options and how they will look in your room’s lighting. Creative Closets offers nine colors and multiple finishes, so ask to see the available choices rather than relying on a verbal description.
Clarify which features are part of the approved design. Depending on the room, that may include different hanging lengths, shelf spacing, drawers, shoe storage, jewelry organizers, mirrors, seating, islands, or lighting options. If a material or indoor-air-quality concern is important to your household, ask the installer to identify the specific product and provide applicable documentation. The EPA notes that particleboard, hardwood plywood, and medium-density fiberboard are common pressed-wood products used in shelving. Cabinetry, and furniture, so precise material language is more useful than broad promises.
What exactly is included on installation day?
Do not assume that “installation” covers every task around the project. Ask whether the scope includes removal and disposal of an existing closet system, spackling or preparation of mounting surfaces, installation, cleanup, and debris removal. Also ask what you must clear before the crew arrives and whether wall repairs are limited to ordinary installation-related preparation.
How will scheduling, quality checks, and warranty coverage work?
Ask what scheduling assumptions apply to your project and what could change the date. Creative Closets generally places manufacturing in weeks two through five and installation scheduling in weeks five through six, but individual projects can vary. Most projects are completed in one day, though that is not a guarantee. Confirm the expected installation date, arrival window, and who will contact you if conditions change.
Finally, ask how components are inspected before they reach your home, how level and aligned installation is checked, and what happens during the final walkthrough. Confirm the written coverage for both materials and workmanship. Creative Closets documents a lifetime guarantee on wood components and a lifetime workmanship warranty; review the lifetime guarantee details so you understand what is covered and how to request service. Before booking, confirm that your Bellevue, Renton, Kent, Issaquah, or other King County address is within the current service area.
Request an in-home consultation for your King County closet project
Frequently Asked Questions
What factors affect the cost of a custom closet?
The estimate reflects the room’s dimensions, layout, finish selections, and storage features such as drawers, shoe storage, accessories, islands, or lighting. A consultation creates a project-specific design and pricing discussion, rather than relying on a universal price for every King County home.
How long does custom closet installation in King County take?
Timing depends on the design, fabrication, and scheduling process. The typical sequence places manufacturing in weeks 2-5 and installation scheduling in weeks 5-6, while most installations are completed in one day. Confirm the expected schedule for your project before approving it.
How should I prepare my closet before installation?
Clear clothing and personal items, identify anything that could affect access, and tell the designer about wall conditions, outlets, trim, or other obstacles. Final measurements, design approval, and confirmation of colors and accessories occur before custom components are prepared.
Can I revise the design after the consultation?
Yes. The design process is collaborative, and homeowners can make real-time changes while viewing a live 3D model. Review hanging lengths, shelf spacing, drawers, and accessories carefully and approve the final design before fabrication begins.
What materials and features can I choose?
Options include nine colors and multiple finishes, along with choices for hanging areas, shelves, drawers, shoe storage, jewelry organizers, mirrors, islands, seating, and lighting. The right combination depends on your room, belongings, and daily routines.
Ready to Plan Your King County Closet Installation?
An in-home consultation can help you review your space, discuss storage priorities, and plan a custom closet that fits your home and daily routine. The process gives you a clear starting point before design and installation decisions are finalized.
Request an in-home consultation for your King County closet project