


If you are researching a custom closet company in Redmond, the most useful first step is not choosing a finish or counting shelves. It is defining what the room must do, what is not working today, and what you want to understand before approving a design. A short planning process makes the consultation more productive.
Schedule your free in-home design consultation
What Should You Decide Before Contacting a Redmond Custom Closet Company?
Start with the outcome you want from the space. A custom closet can support daily dressing, improve access to seasonal items, create better shoe storage, or make a reach-in closet easier to share. You do not need a finished layout before contacting a designer. You do need a clear description of the problems you want the project to solve.
Write down the three frustrations you notice most often. They may include crowded hanging rods, shelves that are difficult to reach, folded clothing without a defined home, or floor space taken up by shoes and accessories. The list helps keep the conversation focused on function rather than a picture that may not fit your habits.
Next, identify the people who use the closet and how their routines differ. A shared space may need separate hanging zones, different shelf heights, or a more deliberate division of drawers. A primary closet may need long-hang space, double-hang space, a place for folded items, and a way to keep frequently used accessories visible.
Think about what may change over time, too. Adjustable shelving and movable components can make it easier to adapt a storage system as your wardrobe, routines, or household needs change. The goal is not to predict every future need. It is to avoid designing a room around only one season of your life.
Which Storage Problems Should Your Redmond Project Solve?
A useful project plan translates general dissatisfaction into specific storage jobs. Instead of saying that the closet feels messy, describe where the friction occurs. Do jackets block shorter clothing? Do shoes collect on the floor? Are drawers missing, difficult to access, or placed where an open door would interfere? These observations give a designer useful starting information.
Separate daily-use items from occasional items
Make two broad groups: items used most weeks and items used occasionally. Daily-use clothing and accessories should be easy to reach without moving other belongings. Seasonal clothing, luggage, keepsakes, and other less frequently used items can use higher or less central storage if the room allows it.
This simple division can reveal why a closet feels full even when it has unused space. A high shelf may be available, but it may not be helping with the items that create daily clutter. A planning conversation should consider both the total amount of storage and the location of each storage type.
List the features that would remove the most friction
Prioritize features by how often they would improve the room. Depending on the space, useful options may include adjustable shelves, drawers, shoe storage, valet rods, hamper space, long-hang sections, double-hang sections, or accessory organizers. You can review relevant custom closet system options for examples, but treat the list as a conversation starter rather than a preset package.
Do not assume that every available accessory belongs in your project. A strong design earns its place by solving a real problem, fitting the room, and supporting the way you use it. Prioritizing features before the consultation also makes later proposal decisions easier.
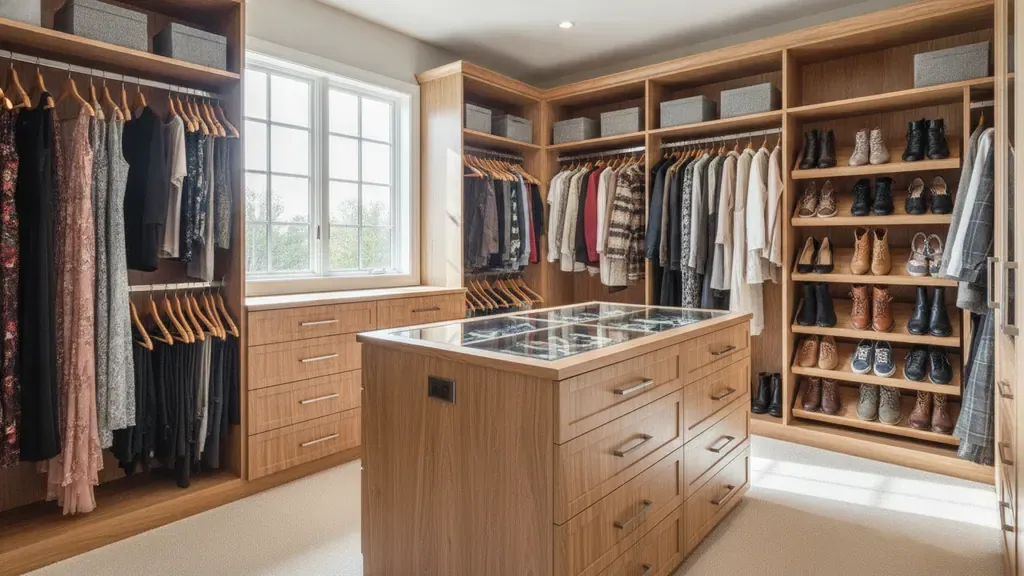
What Should You Measure and Photograph Before the Consultation?
Professional measurement is an important part of the design process, so your notes do not need to replace a site assessment. They do help a Redmond closet designer understand the space before the appointment and make the conversation more efficient.
Record the basic dimensions
Note the approximate width of each wall, the ceiling height, and the depth available for storage. If the room has multiple walls, measure each one separately rather than treating the closet as a single rectangle. Include door openings and the direction each door swings. These details can affect where drawers, towers, or tall storage can work comfortably.
Also note windows, outlets, switches, vents, baseboards, trim, sloped ceilings, and any other feature that interrupts a wall. A photo with a short note can be more useful than a measurement without context. If you are unsure of a dimension, label it as approximate instead of presenting it as final.
Photograph the room from several angles
Take one photo from each corner and at least one close view of unusual conditions. Open the closet doors when photographing the interior. Include the floor, ceiling, wall edges, and nearby furniture when those elements affect access. Remove personal details from images if you plan to send them outside your household.
Photographs also help you identify what you want to keep, change, or remove. They show where belongings accumulate and whether the current layout creates blocked corners or unused vertical space. Bring the images to the consultation, even when an in-home designer will take updated measurements.
Prepare a short inventory
You do not need to count every garment. Instead, estimate the categories that influence the design. Note whether you have more long-hang clothing, folded clothing, shoes, handbags, accessories, or seasonal items. Mention any special storage needs, such as space for tall boots, athletic equipment, luggage, or a hamper.
If two people share the room, describe how each person uses it. A designer can then discuss separate zones and shared zones with the actual routine in mind. This is more useful than requesting a symmetrical layout simply because symmetry looks appealing in a photo.

How Can You Compare a Redmond Closet Proposal Clearly?
When you receive a design or proposal, compare the scope rather than focusing only on the final picture. Two proposals can look similar while including different amounts of shelving, drawers, hanging space, accessories, preparation, or installation work. A clear comparison helps you understand what you are approving.
Compare the layout line by line
Check which walls are included and which areas remain unchanged. Identify the number and location of drawers, shelves, hanging rods, towers, doors, and accessory components. Ask whether the design uses the full available height and whether any corners are intentionally left open for access.
Look for practical details that are easy to miss in a rendering. Can drawers open without striking a door or another cabinet? Can you reach upper shelves safely? Is there enough clearance to stand, turn, and use the closet comfortably? These questions connect the visual design to the daily experience of the room.
Separate included work from decisions still pending
Write down what happens before installation, on installation day, and after the crew leaves. Clarify how existing components are handled, how the room is prepared, and how cleanup is managed. Ask which selections still need approval, such as colors, hardware, accessories, or changes to the layout.
A proposal should make the next decision obvious. If you are not sure whether a feature is included, ask for it to be identified in writing. Clear scope protects the homeowner and gives the design and installation teams the same reference point.
Compare the design process, not just the drawing
Ask how revisions are handled before materials are ordered. Find out whether you will see the design in three dimensions, how measurements are confirmed, and when the final selections must be approved. A design that looks good but leaves these steps unclear can create avoidable uncertainty later.
Creative Closets brings an in-home showroom experience to homeowners in the service area. The in-home consultation process is intended to let you discuss the room where the project will be installed, review options, and make decisions with the space in front of you.
Talk with a Redmond-area closet designer about your project
What Should You Confirm Before Your Design Moves Forward?
Before approving a design, confirm the decisions that can affect the next stage. This is the point to ask questions, request reasonable changes, and make sure the plan reflects the way you intend to use the room.
Confirm the design revision process
Ask how you can request changes and when those changes can be made. A revision may involve moving a shelf, changing drawer placement, adjusting hanging space, or replacing an accessory with a more useful option. Small changes are easier to evaluate before final materials and production details are set.
Review the design from more than one perspective. Think about the room when it is empty, when it is fully loaded, and when another person is using it at the same time. Consider whether the most-used items will remain accessible and whether the layout leaves a clear path through the room.
Confirm timing without overpromising
Ask what must happen between approval and installation. Material availability, final measurements, production, scheduling, and room readiness can all affect the calendar. The installation itself may be completed in one day for many projects, but that does not mean every project has the same total timeline.
Ask when the installation date is selected, what preparation the homeowner should complete, and who to contact if a condition in the room changes. A realistic schedule is more useful than a promise that does not account for the project’s scope.
Confirm how the finished work will be reviewed
Ask how the team handles a final walkthrough and what to do if an adjustment is needed after installation. A clear handoff gives you a chance to confirm that the completed layout matches the approved design and that drawers, doors, shelves, and accessories operate as expected.
You can also review the company’s guarantee information separately so you understand the documented coverage that applies to the products and workmanship. Keep warranty questions distinct from the project-planning questions in this guide. They serve different parts of the decision.
What Belongs in a Redmond Closet Project Brief?
A one-page project brief can keep your consultation focused. It does not need design terminology. Use plain language that describes your household, your space, and the decisions you want help making.
- Room: Identify the room and whether it is a walk-in, reach-in, wardrobe, or another storage area.
- Main problems: List the three storage frustrations you most want to solve.
- Daily priorities: Note the items you use most often and want within easy reach.
- Less frequent items: Identify seasonal belongings, luggage, shoes, accessories, or other items that need a home.
- Constraints: Include doors, windows, outlets, vents, trim, ceiling conditions, and access limitations.
- People using the space: Explain whether the room is shared and where routines differ.
- Preferred decisions: Note the features, colors, or organization ideas you want to discuss, without assuming they are the final answer.
- Questions: Write down what you want to clarify about revisions, measurements, scheduling, installation, and the final walkthrough.
Bring the brief, room photos, and any approximate measurements to the appointment. If your project is a walk-in closet, you can also review the walk-in closet planning information before the visit. For a smaller bedroom closet, the reach-in closet guide may help you identify the storage functions that matter most.
The brief is not a contract or a final design. It is a way to make sure the conversation starts with your actual goals instead of a generic list of features.
What Do Redmond Homeowners Ask Before a Closet Consultation?
These questions stay focused on preparation and next steps rather than repeating the provider-selection framework covered elsewhere.
Do I need exact measurements before I schedule?
No. Approximate dimensions and clear photos are helpful, but an in-home consultation should include professional evaluation of the space. Share what you know and label estimates clearly. The designer can confirm the measurements and account for walls, trim, doors, outlets, and other conditions.
Can I change the design after seeing it?
Ask the designer when changes can be made and when final approval is required. A consultation is the right time to discuss moving storage components, changing accessory priorities, or adjusting the balance of shelves, drawers, and hanging areas.
How should I prepare the closet for an in-home visit?
Make the room accessible and identify the items or conditions you want the designer to see. You do not need to empty every shelf before the visit. A clear view of the walls, doors, floor, and ceiling helps the designer evaluate the space accurately.
What should I bring to the consultation?
Bring your project brief, photos, approximate measurements, and a short list of questions. If the closet is shared, make sure the people who use it can explain their priorities. That information helps the design reflect real routines instead of assumptions.
How do I compare the next steps after the appointment?
Review the layout, included components, remaining selections, revision deadline, anticipated schedule, and installation expectations. If any part is unclear, ask for a written explanation before approving the design. The best next step is the one you understand and can evaluate confidently.
How Do You Start a Custom Closet Project in Redmond?
Start by describing the room’s problems, documenting its constraints, and deciding what you want the consultation to answer. A focused brief gives a designer useful context without forcing you to solve the layout alone. Creative Closets serves Redmond homeowners with an in-home design process for custom storage projects across the area.
To learn more about the company’s local service path, visit the custom closets in Redmond page. You can also review the company’s background and team information before scheduling.
Ready to plan your Redmond custom closet? Schedule your free in-home design consultation