

A closet remodel is easier to manage when the decisions are made in the right order. Before choosing drawers, shelves, finishes, or accessories, you need a clear picture of the room, how you use it, and what the installation will require.
A closet remodel in King County typically moves from measured scope to a tailored layout. Transparent project pricing, approved finishes and accessories, manufacturing, installation, and a final quality check. A professional in-home consultation can bring measurements, space planning, real-time 3D design, and pricing together in one visit. That gives you a chance to evaluate the plan before work begins.
Start your free in-home closet consultation
That process also helps separate universal needs from project-dependent details. A reach-in closet has different constraints than a walk-in, and scheduling depends on the approved design, materials, and manufacturing requirements. Start by defining what the remodel should include, then use that scope to guide every later decision.
What Should a Closet Remodel in King County Include?
A well-scoped closet remodel starts with how you use the space, not with a list of products. The goal is to understand what the room must hold, how you move through it, and which parts of the existing closet should be removed or retained. That process creates a practical design for the actual room rather than a collection of storage pieces that may not work together.
Start with the room and your daily goals
Walk-in and reach-in closets call for different planning decisions. A walk-in design may organize several walls into distinct zones for hanging clothes, folded items, shoes, accessories, and laundry. Depending on the layout, it can include adjustable shelves, drawers, dedicated hanging sections, shoe storage, mirrors, valet rods, or hampers. The right mix depends on what you want within easy reach and what can be stored higher or farther back.
A reach-in closet has less room to distribute storage, so the design must make careful use of the available wall and opening. As a general starting point, a reach-in may need at least four feet of wall space and about two feet of depth. Subject to the actual room and final design. Review the room’s measurements, door swing, trim, outlets, and any obstructions before choosing a configuration. Our guide to standard closet dimensions can help you prepare questions, but it should not replace measurements at your home.
Measure, remove, and prepare the space
The scope should account for more than the finished shelving. Measurements and space planning establish the usable footprint, while a final measurement verification helps confirm the design before manufacturing. If an existing wire system, shelving, or cabinetry is in the way, removal and disposal should be included in the installation plan. Wall repair and preparation may also be needed before the new system is installed. Planning these steps early helps prevent a finished design from being limited by an old bracket, damaged drywall, or an overlooked baseboard.
For a closet remodel in King County, an in-home consultation can bring these decisions together. Creative Closets describes a process that combines a consultation, measurements, space planning, real-time 3D design, and pricing during one visit. The documented consultation typically lasts 60 to 90 minutes. A designer can use that time to discuss your storage goals, review finishes and accessories, and show how the proposed zones fit the room.
The result should be a clear scope: the room being remodeled, the storage zones included. The finish and accessory choices, the treatment of the existing system, and the preparation required before installation. Creative Closets is headquartered in Maple Valley and serves residential customers across King and Pierce Counties, with service-area eligibility confirmed for locations near the outer limits. A defined scope makes the next steps easier to review, approve, manufacture, and install.
How Is the Price of a Closet Remodel Determined?
A proposal for a closet remodel in King County is built around the space and the way you want to use it, not a one-size-fits-all package. Dimensions establish how much wall and floor area is available. The layout then determines how that space is divided among hanging sections, shelves, drawers, doors, hutches, and other storage zones. A reach-in and a walk-in may need very different configurations even when they serve similar household needs.
Finishes and accessories also affect the design. Color selection, material choices, and accessory placement are part of the planning process, so the proposal should make those decisions visible rather than treating them as afterthoughts. For example, drawers require a different configuration than open shelving, while doors and hutches add distinct storage and visual elements. The right choice depends on what you store, how often you reach for it, and the appearance you want in the room.
| Choice | Pricing impact |
|---|---|
| Dimensions and layout | Changes the amount of material and the way storage components are arranged. |
| Drawers, doors, and hutches | Adds purpose-built components and changes the configuration of the system. |
| Finishes | Influences the selected material and the finished appearance. |
| Accessories | Adjusts the design around features such as shoe storage, hampers, mirrors, or valet rods. |
| Removal and installation scope | Accounts for existing-system removal, wall preparation, installation, and cleanup when those services are needed. |
Installation scope matters because remodeling can involve more than placing new components. If an existing system must be removed, or the wall requires preparation before installation, those steps should be clarified in the proposal. Asking what is included helps you compare the actual project scope instead of comparing incomplete numbers.
A useful review asks whether the design reflects your measurements, storage priorities, selected finishes, accessories, and site requirements. Creative Closets documents an in-home process that combines consultation, measurements, space planning, real-time 3D design, and pricing during the visit. That format gives you an opportunity to review the configuration and revise choices before the project moves forward. For more detail on planning a walk-in project, see this guide to custom walk-in closet planning.
Because every room and specification is different, the final proposal should be treated as project-specific. A clear design, itemized choices, and defined installation scope provide a more useful basis for decision-making than an unsupported price range.
How Does the Design and Scheduling Process Work?
A well-planned closet remodel moves from ideas to installation through a series of confirmations. The goal is to make the important decisions while the design is still flexible, then verify the details before materials are manufactured.
-
Start with an in-home consultation
The in-home showroom process typically takes 60 to 90 minutes. During the visit, the designer discusses how you use the space, measures the room, and begins planning the layout. That conversation can cover hanging areas, shelving, drawers, shoes, accessories, and any features that would make the closet easier to use. Reviewing custom walk-in closet planning can also help you identify priorities before the appointment.
-
Review the design in real time
Measurements and space planning are translated into a real-time 3D design during the consultation. Seeing the proposed arrangement makes it easier to discuss proportions, storage zones, and the way the system will fit the room. Layout optimization, finish selection, and accessory placement can be adjusted as the design develops rather than left as assumptions on a written estimate.
-
Review pricing and confirm the design
Pricing is presented during the in-home visit and reflects the choices made for the project. Dimensions, configuration, finishes, and accessories all affect the final scope. Take time to review what is included, ask questions about any revisions, and confirm that the proposed storage addresses your daily needs. Approval comes before manufacturing and scheduling, so this is the right point to resolve open decisions.
-
Complete verification and deposit requirements
Before production begins, the workflow includes final measurement verification and design approval. Deposit collection is also part of the documented pre-installation process. These steps create a clear point of agreement about the design, project scope, and the conditions needed to move forward.
-
Confirm finishes and accessories
Colors, finishes, and accessories are confirmed before manufacturing. This may include choices such as drawers, hanging sections, adjustable shelves, shoe storage, mirrors, valet rods, or hampers, depending on the room and design. Confirming these details early helps prevent last-minute substitutions or changes that could affect production.
-
Manufacture, inspect, and schedule installation
Once the design is approved and selections are confirmed, the system moves into manufacturing. Quality control is part of the pre-installation workflow before an installation date is finalized. There is no single lead time that applies to every closet remodel in King County. Total timing depends on the project and materials, so the installation schedule should be confirmed after the manufacturing requirements are known.
This sequence gives homeowners a practical decision trail: measure first, visualize the design, approve the scope, confirm the details, and then schedule the work. It also leaves room for the differences between a compact reach-in closet and a larger walk-in project.
What Happens During Installation Day?
Installation day is when the approved design becomes a finished storage system. A smooth visit starts with a clear path to the closet and a prepared decision about what should stay in the room. Remove clothing, bins, and personal items before the crew arrives, and clear nearby walkways so the team can protect the surrounding area and work safely. If an existing system is being replaced, confirm which shelves, rods, or accessories should be removed and which items should be retained.
Removal and wall preparation
The first phase may include removing and disposing of the existing closet system. Once the space is open, the installers can identify the condition of the walls and prepare the surfaces for the new layout. Wall repair and preparation are part of the documented installation operation, which helps create a clean foundation for accurate placement. The amount of preparation depends on what was previously installed and the condition of the room. So the finished result may require more than simply taking down old shelving and attaching new components.
Installing the custom system
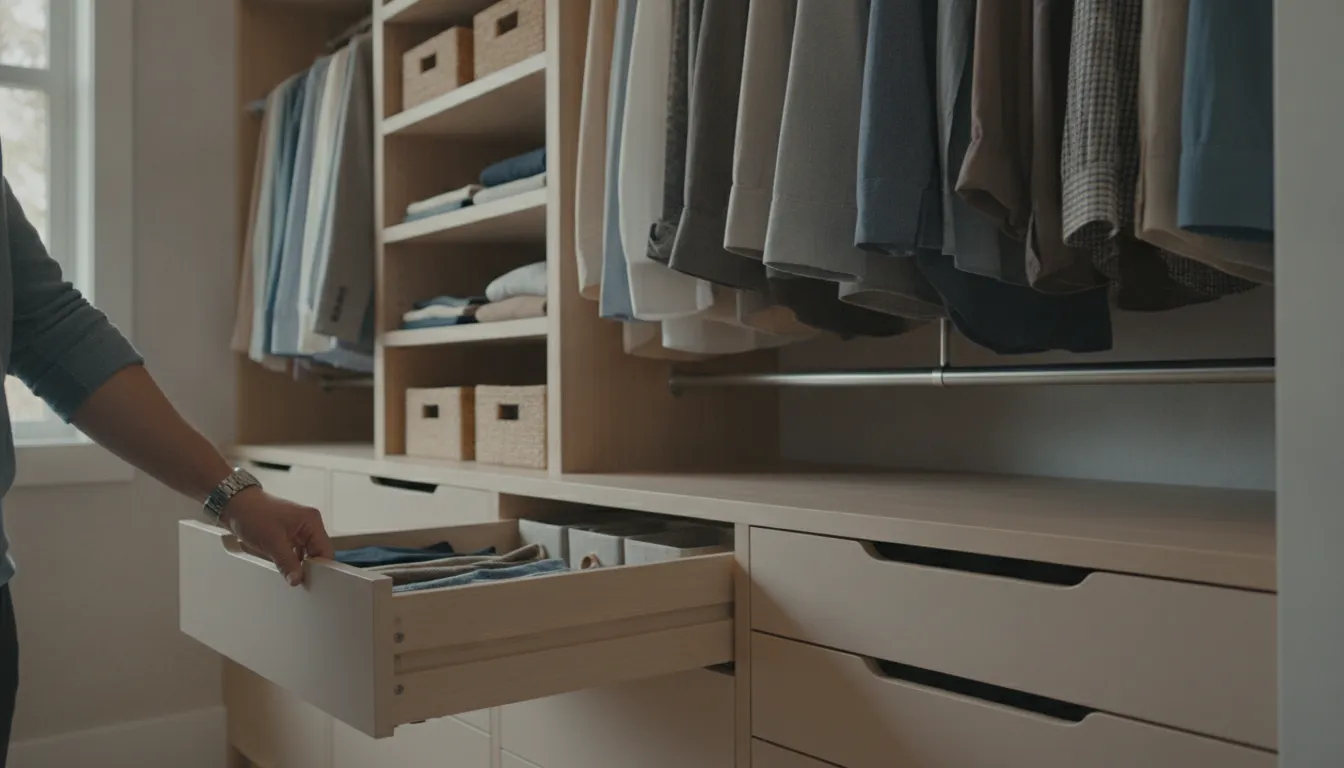
After preparation, the professional installers assemble and secure the approved components according to the final design. That can include hanging sections, shelves, drawers, shoe storage, or other selected accessories. The team works from the verified measurements and approved finishes rather than making informal layout changes on site. If a question comes up about a feature or placement, address it before the work moves too far forward. This protects the design intent and gives the right people a chance to confirm any adjustment.
For homeowners planning a reach-in project, the reach-in closet installation process provides additional context about preparation, installation, and post-installation adjustments. The same principle applies to a broader closet remodel in King County: the final scope and room conditions influence how the work proceeds.
Cleanup and quality checks
Cleanup is included in the documented installation operations. The crew should remove installation debris and leave the closet ready for your review. Before signing off, open and close drawers, test moving hardware, inspect shelf and rod placement, and look at visible edges and finishes in the room’s actual lighting. Raise questions while the installation team is still present so they can distinguish a normal adjustment from a larger issue that needs follow-up.
Creative Closets documents a team of six full-time professional installers rather than relying on subcontractors. Most projects are described as completed in one day, but that is not a promise that every installation will follow the same schedule. The size of the system, removal and wall-preparation needs, materials, and overall scope can affect the duration. Your confirmed schedule should reflect the specific project rather than a universal installation-day guarantee.
What Should You Check Before Signing Off?
A careful walkthrough at the end of installation gives you a chance to confirm that the finished system matches the approved design and works as intended. Take your time. A closet can look complete while a small alignment, hardware, or cleanup issue still needs attention.
Review the finish and alignment
Stand back and look at the full installation from several angles. Panels, shelves, and trim should sit straight and align cleanly with one another. Check that edges are finished, corners are secure, and visible surfaces are free from unexpected scratches, chips, or gaps. Compare the installed colors and materials with the selections approved during design. If the room includes a mix of open storage and drawers, confirm that the proportions and placement match the plan rather than relying only on the overall impression.
Test every moving part
Open and close each drawer, door, and accessory. Drawers should move smoothly and sit evenly when closed. Test hanging rods for secure attachment and make sure they have enough clearance for the clothing you plan to store. If the design includes valet rods, hampers, mirrors, or other accessories, operate each one before the team leaves. Check adjustable shelves at their intended heights and confirm that hardware is tight and comfortable to use. Small adjustments are easier to address immediately than after the closet is loaded.
Confirm cleanup and documentation
Ask for a final look at the floor, baseboards, walls, and nearby surfaces. Removal and disposal of an existing system, wall preparation, installation, and cleanup are part of the documented installation operations. But the homeowner walkthrough should still confirm that the work area is ready for normal use. Make sure debris and protective materials are removed and that you know how to care for the selected finishes.
Keep your approved design information, finish selections, and warranty documentation together. Creative Closets describes its products and workmanship as covered by a lifetime warranty, with transferability when the home is sold. Review the terms and the process for requesting service in the lifetime warranty documentation, rather than assuming every future issue is covered automatically.
Ask about permits and material safety when relevant
A closet installation does not automatically mean the same permit requirements apply to every home or scope of work. King County describes remodeling as changing the interior space of an existing structure without creating new floor area. And its guidance says a building permit may apply when a project alters or repairs a building or structure. The county also identifies some interior finishes as generally exempt unless critical-area conditions apply. Review the current King County permit guidance and ask the appropriate permitting office when the work goes beyond a straightforward storage installation.
If existing materials may be disturbed during removal or remodeling, pause and ask about asbestos before work begins. Washington Labor and Industries says homeowners and contractors must identify asbestos before renovation, repair, maintenance. Or demolition, and that testing is needed because asbestos cannot be identified reliably by appearance alone. Read the Washington L&I asbestos guidance and use qualified inspection and testing when applicable.
Which Closet Remodel Approach Fits Your King County Home?
The right remodel approach starts with the room you have, not a preset package. A walk-in closet gives you more room to divide storage by function and movement. A reach-in closet can still gain substantial capacity when the layout uses the available wall space and depth carefully.
When a walk-in remodel makes sense
Walk-in projects are a good fit when you want the closet to function as a complete dressing and organization area. The design can combine adjustable shelving, drawers, dedicated hanging sections, shoe storage, mirrors, valet rods, hampers, and other accessories. The goal is not to fill every wall automatically. It is to create a practical balance between frequently used items, seasonal storage, visibility, and comfortable movement through the room.
Layout decisions matter more as the room grows. One wall may carry everyday hanging storage, while another handles folded clothing or shoes. Drawers can keep smaller items contained, and adjustable shelves allow the system to change as storage needs change. Reviewing custom walk-in closet planning can help you think through those zones before the in-home design visit.
When a reach-in remodel is the better fit
A reach-in closet is often the practical choice when the room has a single storage wall and limited floor area. As a general starting point, the space may need at least four feet of wall space and about two feet of depth. Although the actual room and design determine what will work. Those dimensions should be verified on site rather than treated as a universal rule. You can review standard closet dimensions for background, then use the consultation to confirm the measurements and storage priorities.
Reach-in systems can be tailored around the way you use the closet. Hanging sections, shelves, drawers, and accessory storage can make a narrow space easier to manage without changing the room’s footprint. The best plan may also account for door swing, trim, baseboards, and access to the back of the closet. A measured design is more useful than choosing components from a catalog without considering those conditions.
Confirming service before you plan
Creative Closets is headquartered in Maple Valley and serves residential customers across King and Pierce Counties. Its documented King County service area includes communities such as Bellevue, Renton, Kent, Issaquah, Sammamish. Maple Valley, Covington, Newcastle, Mercer Island, Kirkland, Redmond, Enumclaw, Black Diamond, Burien, and Federal Way. The normal service territory is centered within roughly 30 to 40 miles of Maple Valley, so service at an outer-limit address is handled case by case.
That check is an important early step for any closet remodel in King County. During a free, no-obligation in-home consultation, the team can review the room, take measurements, discuss the intended storage, and develop a design suited to the space. The documented visit typically combines consultation, real-time 3D design, and pricing in about 60 to 90 minutes. If the project fits your home and priorities, you can move forward with a clearer plan rather than guessing at the scope.
Schedule your free in-home consultation
Frequently Asked Questions
How is the cost of a closet remodel determined?
There is no single price that fits every project. The estimate reflects the closet’s dimensions, layout, finishes, drawers, doors, hutches, accessories, and installation scope. A design review helps you compare those choices before approving the final plan, rather than relying on a generic square-foot figure.
How long does a closet remodel take from planning to installation?
The overall schedule depends on the design, materials, manufacturing requirements, and installation scope. Final measurements, design approval, finish and accessory confirmation, manufacturing, quality control, and scheduling all occur before installation. Most projects are described as completed in one day, but the full lead time is project-dependent.
What should I expect on installation day?
The installation team may remove and dispose of the existing system, prepare or repair the walls, install the new components, and clean the work area. Before the visit, clear personal items from the closet and discuss any wall, trim, flooring, or access concerns that could affect the work.
Do I need a permit for a closet remodel in King County?
Permit needs depend on the work, property conditions, and whether the project alters or repairs the structure. King County advises checking permit requirements for building alterations, while some interior finishes generally do not require a permit unless critical-area conditions apply. If demolition could disturb suspect materials, Washington Labor and Industries recommends asbestos identification before work begins: review King County’s permit guidance and asbestos safety guidance.
What should I check before signing off on the finished closet?
Check that shelves, drawers, doors, hanging areas, and accessories are aligned, secure, and operating smoothly. Also review the finish, wall transitions, cleanup, and any agreed design details. Keep your project documentation and ask how warranty coverage applies. Creative Closets describes products and workmanship as covered by a lifetime warranty, with transferability when the home is sold.
Plan Your Closet Remodel With a Clear Next Step
A thoughtful consultation can connect your storage goals with a practical design, realistic project scope, and a clear plan for moving forward. Creative Closets can review your space and priorities during a free, no-obligation in-home consultation.
Schedule your free in-home closet consultation