

A mudroom works better when every daily item has a planned landing place. Before choosing locker doors or finish colors, measure the wall, note nearby door swings, and consider how adults sit, move, and put on shoes. That early planning helps the storage feel integrated with the home instead of added beside it.
Plan your custom mudroom storage consultation
Built-in mudroom lockers and bench storage combines a comfortable seat with personal cubbies, accessible hooks, closed cabinets, and durable finishes. The best layout depends on wall dimensions, traffic paths, storage habits, and installation conditions. Use standard dimensions as planning guidance, then test the proportions in your own entryway.
This guide focuses on practical planning decisions for an adult household. Divide the wall into useful zones, protect the walking path, and prepare for a smooth installation. For homeowners in King and Pierce Counties, an in-home design consultation can turn those observations into a measured plan.
What Should Built-In Mudroom Lockers and Bench Include?
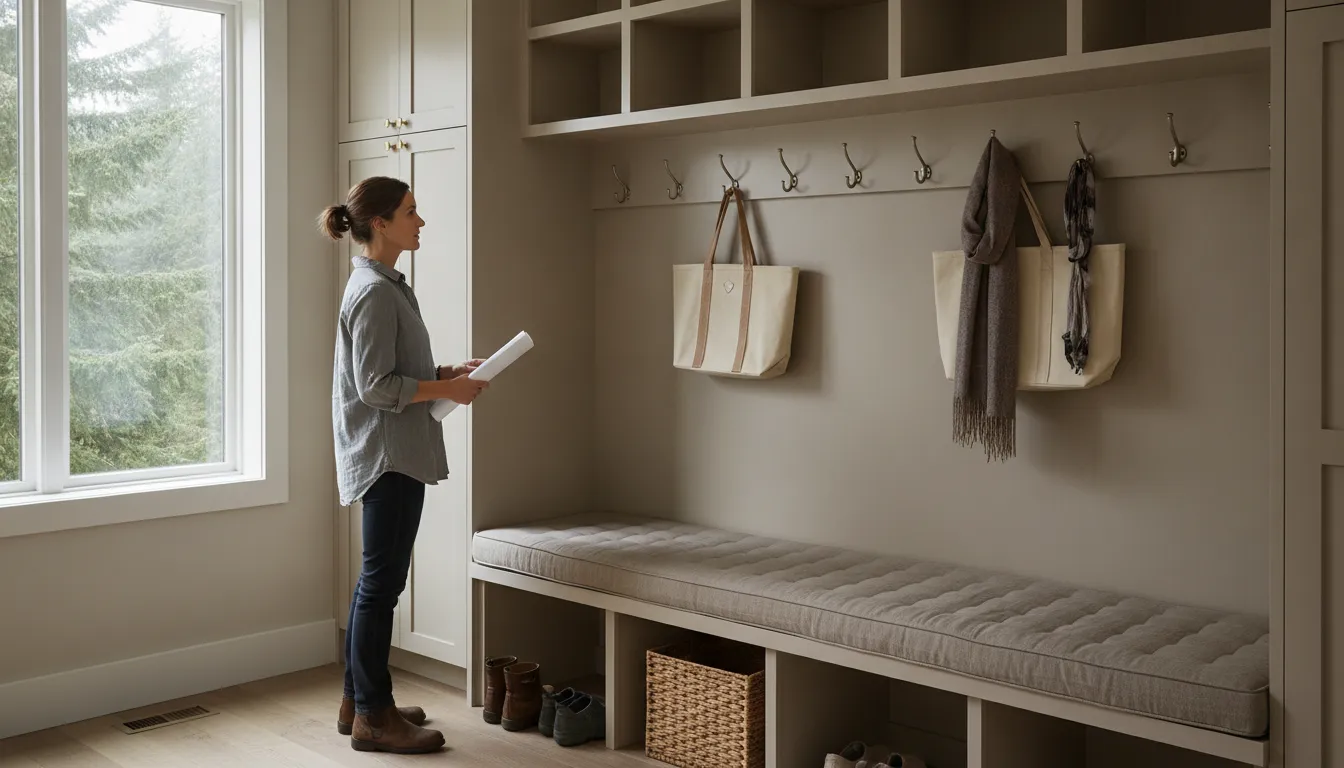
A useful system gives each category of daily gear a logical landing place without making the entryway feel crowded. The core combination usually includes a bench, vertical locker sections, open cubbies, hooks, drawers, and overhead storage. Each component has a different job, so the system should be planned as a set of connected zones rather than as one large cabinet.
| Zone. | Best use. | Planning priority. |
|---|---|---|
| Bench. | Sitting and lower storage. | Comfort, cleaning access, and clear passage. |
| Locker. | Coats, bags, and personal items. | Reach, ownership, and door clearance. |
| Open cubby. | Daily items that need visibility. | Easy access without crowding the bench. |
| Upper cabinet. | Seasonal or less-used belongings. | Safe reach and reduced visual clutter. |
Start with the locker zone
Lockers provide the vertical structure of the installation. Plan each section around the belongings that need to be stored there, such as coats, footwear, bags, and accessories. Open fronts make frequently used items easy to see. Doors can create a calmer appearance when you prefer to conceal everyday clutter.
The important decision is not simply how many lockers will fit. It is whether each section supports the way people enter and leave the home. A person who comes through the garage may need a coat hook, shoe storage, and a bag cubby close together. Someone who uses the front door may need a smaller drop zone that does not interrupt the main approach.
Make the bench do more than provide a seat
The bench should create a stable place to sit while putting on or removing shoes. It can also organize the lower zone. Open space beneath the seat can hold boots, baskets, or bins, while drawers below or beside the bench can contain smaller items such as gloves, hats, reusable bags, or pet-walking supplies.
Leave enough access to sweep or vacuum beneath the bench. A recessed base can make cleaning easier, but the right choice depends on the room, flooring, and cabinet construction. If the bench will be used every day, test the seating position before finalizing the finished height and the thickness of the top.
Use overhead storage deliberately
Overhead cabinets or shelves reserve the highest space for seasonal belongings and items that do not need to be accessed every day. Keep daily-use storage at eye and hand level. Use the upper zone to reduce visual clutter, but avoid placing frequently handled items where reaching becomes uncomfortable.
Cubbies can bridge the bench and upper storage zones. Assigning a cubby or locker section to each adult makes ownership clear and limits the tendency for coats and bags to spread across the room. The zones do not need to be identical. A household member with more outerwear may need a different combination of hooks, shelves, and hanging space.
How Do You Size Built-In Mudroom Lockers and Bench Storage?
Good dimensions make a mudroom feel easy to use rather than crowded. The right proportions depend on the adults using the space, the footwear and outerwear being stored, the wall available for cabinetry, and the walking route through the room. Standard figures can help you begin, but they should not replace an in-room test or a measured design.
- Measure the room and protect the walking path. Record the full wall length, ceiling height, door swing, trim, baseboards, outlets, and nearby openings. Mark the proposed locker face on the floor with painter’s tape. Walk through while carrying shoes, bags, or coats. A bench that looks reasonable on paper may feel intrusive when the entry is busy.
- Test the seat height. Sit on a sturdy stool, temporary box, or stacked cushions at several heights. Check whether your feet rest comfortably, your knees feel relaxed, and you can stand without bracing against the lockers. Include the finished seat thickness in the measurement. A comfortable height is a usability decision, not a number to copy without testing.
- Match locker depth to what must fit. Start with the largest everyday belongings, such as coats on hangers, boots, bags, and storage baskets. A shallower unit may suit a narrow passage. Added depth may help with bulky items, but it also changes the walking clearance. Confirm the finished depth against the door hardware and the route through the room.
- Plan useful space below the bench. Decide whether the lower area will hold boots, baskets, or bins. Consider whether the opening should remain visible or whether drawers and doors would make the room feel more orderly. Leave enough room for cleaning and make sure the lower storage does not interfere with baseboards or floor transitions.
- Reserve reach-friendly zones for daily items. Place the items used most often where adults can reach them without climbing or moving other belongings. Seasonal gear can move higher or into closed cabinets. This simple priority system keeps the entryway functional during busy mornings.
When a mudroom is narrow, the most important measurement may be the clear passage in front of the storage. A custom plan can work around a corner, a door casing, or an offset wall instead of forcing the room to accommodate a standard furniture piece.
Which Storage Zones Make an Entryway Easier to Use?
The most useful entryway storage gives every category of item a defined landing place. Instead of treating the wall as one large cabinet, divide it into zones based on what adults remove, carry, and need to reach as they move through the home. This approach keeps the design grounded in routine rather than appearance alone.
Create a landing zone for bags and small items
Bags, keys, sunglasses, mail, and reusable shopping totes can quickly cover a bench or countertop. Give these items a dedicated location near the entrance. A small drawer, shelf, or open cubby can keep the landing zone visible without allowing every surface to become a catchall.
Separate footwear from hanging items
Shoes and boots need a lower zone that is easy to reach and easy to clean. Coats, jackets, and bags need hooks or hanging space above. Keeping these functions near one another makes the bench useful while reducing the number of trips across the room. If footwear often arrives wet, plan a ventilated or open area instead of relying on a tightly enclosed compartment.
Give each adult a clear ownership zone
Personal zones do not need to be equal, but they should be obvious. Assigning a locker, hook group, or cubby to each adult makes it easier to return belongings to the same place. It also makes the design more adaptable when storage needs differ between household members.
Creative Closets’ entryway storage ideas can help you compare open and closed approaches. For a cabinet-focused view, review custom entryway cabinets and consider which combination best fits the room’s traffic pattern.
What Materials and Finishes Work Well in a Working Mudroom?
A mudroom finish should support the way the room is used. The surfaces encounter shoes, bags, damp outerwear, cleaning products, and frequent hand contact. Select finishes for appearance, but also consider how easily they can be wiped, how they coordinate with nearby rooms, and whether small marks will be noticeable.
Start with cleanability and moisture awareness
Keep the floor beneath and around the bench accessible for routine cleaning. Open shoe storage can make footwear easy to grab, but it may also leave more visual clutter. Closed doors and drawers create a calmer appearance, but they require enough interior ventilation and a layout that does not trap items that should dry.
Use a surface plan that matches the entryway’s conditions. A bench top receives repeated contact, so it should feel stable and be easy to maintain. Cabinet faces and hardware should be selected together. The result should look intentional when the locker doors, hooks, bench, trim, and wall color are viewed as one composition.
Coordinate the bench, trim, and wall treatment
Trim can close gaps and connect the storage to the wall, baseboards, and nearby door casing. A coordinated finish can make the installation feel like part of the architecture. If the entryway opens into a hall or kitchen, repeating a finish or color can create a smoother transition between spaces.
Wall treatments can add character, but they should not make the storage difficult to clean or install. If you are considering a feature wall, determine how it meets the locker backs, bench, and trim before finalizing materials. The best decorative choice supports the storage plan instead of competing with it.
Plan hardware and future flexibility
Hooks, pulls, and hinges should be comfortable to use and visually consistent with the rest of the home. Select hardware based on what it must hold and how adults will reach it. Avoid relying on an unsupported weight rating. The better planning question is whether the hardware, mounting surface, and storage zone are appropriate for the intended use.
Adjustable interiors can make the system more useful as storage habits evolve. Leave reasonable access for repairs. Avoid making a component impossible to remove without dismantling the entire installation. A flexible design can remain helpful even when the household’s routines change.
How Can You Plan Built-In Storage Around Doors and Walk Paths?
Built-in storage must fit the room that exists, including its doors, trim, outlets, vents, and floor transitions. A design that ignores those details can look attractive in a sketch and feel awkward in daily use. Take a complete measurement set before selecting the final combination of lockers, bench, cabinets, and hooks.
Measure the full wall and the approach to it
Measure from corner to corner, then note every interruption. Include door casing, window trim, baseboards, switches, outlets, vents, and any change in floor height. Photograph the wall from several angles so the design team can see how the storage relates to the rest of the room.
Document door swings and pinch points
Open every nearby door fully. Observe where the door edge travels and where a person stands while entering or leaving. Mark pinch points where a locker, drawer, or bench could reduce comfortable movement. Drawers need room to open. A hinged door needs room for a person to stand in front of it. These clearances should be considered before the cabinet footprint is set.
Locate utilities and mounting conditions
Note the location of outlets, switches, vents, plumbing access, and any other utility that cannot be covered. Identify the wall surfaces available for mounting and record flooring conditions below the proposed bench. Existing walls may not be perfectly square, so the final installation plan should account for scribing, trim, and small variations.
Test the design at full scale
Painter’s tape can outline the proposed cabinet face, bench edge, and drawer openings. Walk through the room with a coat, bag, and pair of shoes. Sit down, stand up, open an imaginary drawer, and approach the door from several directions. This simple test often reveals a clearance issue before materials are ordered.
For more local planning inspiration, see Creative Closets’ corner mudroom ideas. If doors are part of your concept, the guide to mudroom lockers with doors can help you think through open and concealed storage.
When Is a Custom Mudroom Design Worth Planning With a Professional?
Professional planning is especially valuable when the entryway has an awkward wall, limited floor area, multiple traffic paths, or more storage needs than a freestanding piece can handle. A custom design can connect the bench, lockers, hooks, cubbies, and cabinets to the room instead of forcing the room to work around standard furniture.
Look for these signs
- The available wall includes doors, corners, trim, outlets, or other interruptions.
- The bench must fit a narrow passage without reducing a comfortable walking route.
- Several adults use the entryway and need clearly separated storage zones.
- The room must hold both everyday belongings and seasonal items.
- You want the finish, hardware, and trim to coordinate with the rest of the home.
- You need help turning measurements and routines into a complete installation plan.
Creative Closets brings the design process into the home. The team can review the room, create a 3D visualization, discuss finishes and accessories, and plan the installation around the existing space. The in-home approach is useful when the goal is a system that looks integrated and works within the actual entryway.
Review the company’s mudroom cabinet storage features before your appointment. Bring a list of the items that need a home, note which ones require quick access, and identify any doors or walkways that cannot be narrowed.
Talk through your mudroom layout and storage zones
Frequently Asked Questions
How deep should a mudroom locker with a bench be?
Use the wall depth, coat volume, footwear, and walking clearance to guide the design. The right depth is the one that stores the intended belongings without narrowing the route through the room. Test the proposed cabinet face with painter’s tape and confirm that doors, drawers, and the bench remain comfortable.
What should go under a built-in mudroom bench?
Plan the lower zone around the items removed at the entry. Open space can hold boots, shoes, baskets, or bins. Drawers or closed cabinets can conceal smaller items and reduce visual clutter. Leave enough access for cleaning and choose storage that matches the household’s daily routine.
Are mudroom lockers and hall trees the same thing?
They can serve similar purposes, but they are not the same type of solution. A hall tree is typically a freestanding furniture piece. Built-in lockers and a bench are planned for the specific wall, trim, floor, storage needs, and walk paths in the home. The built-in approach can use an awkward footprint more deliberately.
How do I plan a mudroom locker system around doors and trim?
Measure the full wall, document door swings, note baseboards and casing, and locate outlets, switches, vents, and other fixed features. Mark the proposed storage face on the floor and test the approach with the doors open. A measured design should account for those conditions before installation begins.
When should I work with a professional designer?
Consider professional planning when the entryway is narrow, the wall is irregular, or the room needs several storage functions in one footprint. A designer can combine measurements, storage zones, finish selection, 3D visualization, and installation preparation into one coordinated plan. That process can also help you identify clearance issues before the system is built.
Schedule Your Mudroom Design Consultation
A well-planned locker and bench system should fit your room, routines, and installation conditions. Review the items you want to store, the areas that need quick access, and the parts of the walking path that must remain open.
Schedule an in-home design consultation to plan built-in mudroom lockers and bench storage for your home.